Dragon Quest 3 Remake: Navigate Zoma's Citadel

Quick Links
After embarking on a long journey through various quests and dungeons in the Dragon Quest 3 Remake, you'll find yourself facing the ultimate challenge at Zoma's Citadel. This final dungeon is a true test of skill, pushing players to utilize every strategy and tactic learned throughout the game. It's the toughest challenge in the main story of DQ3 Remake. In this comprehensive guide, we'll walk you through every floor of Zoma's Citadel, helping you navigate its complexities and locate all the treasure hidden within.
How to Reach Zoma's Citadel in Dragon Quest 3 Remake
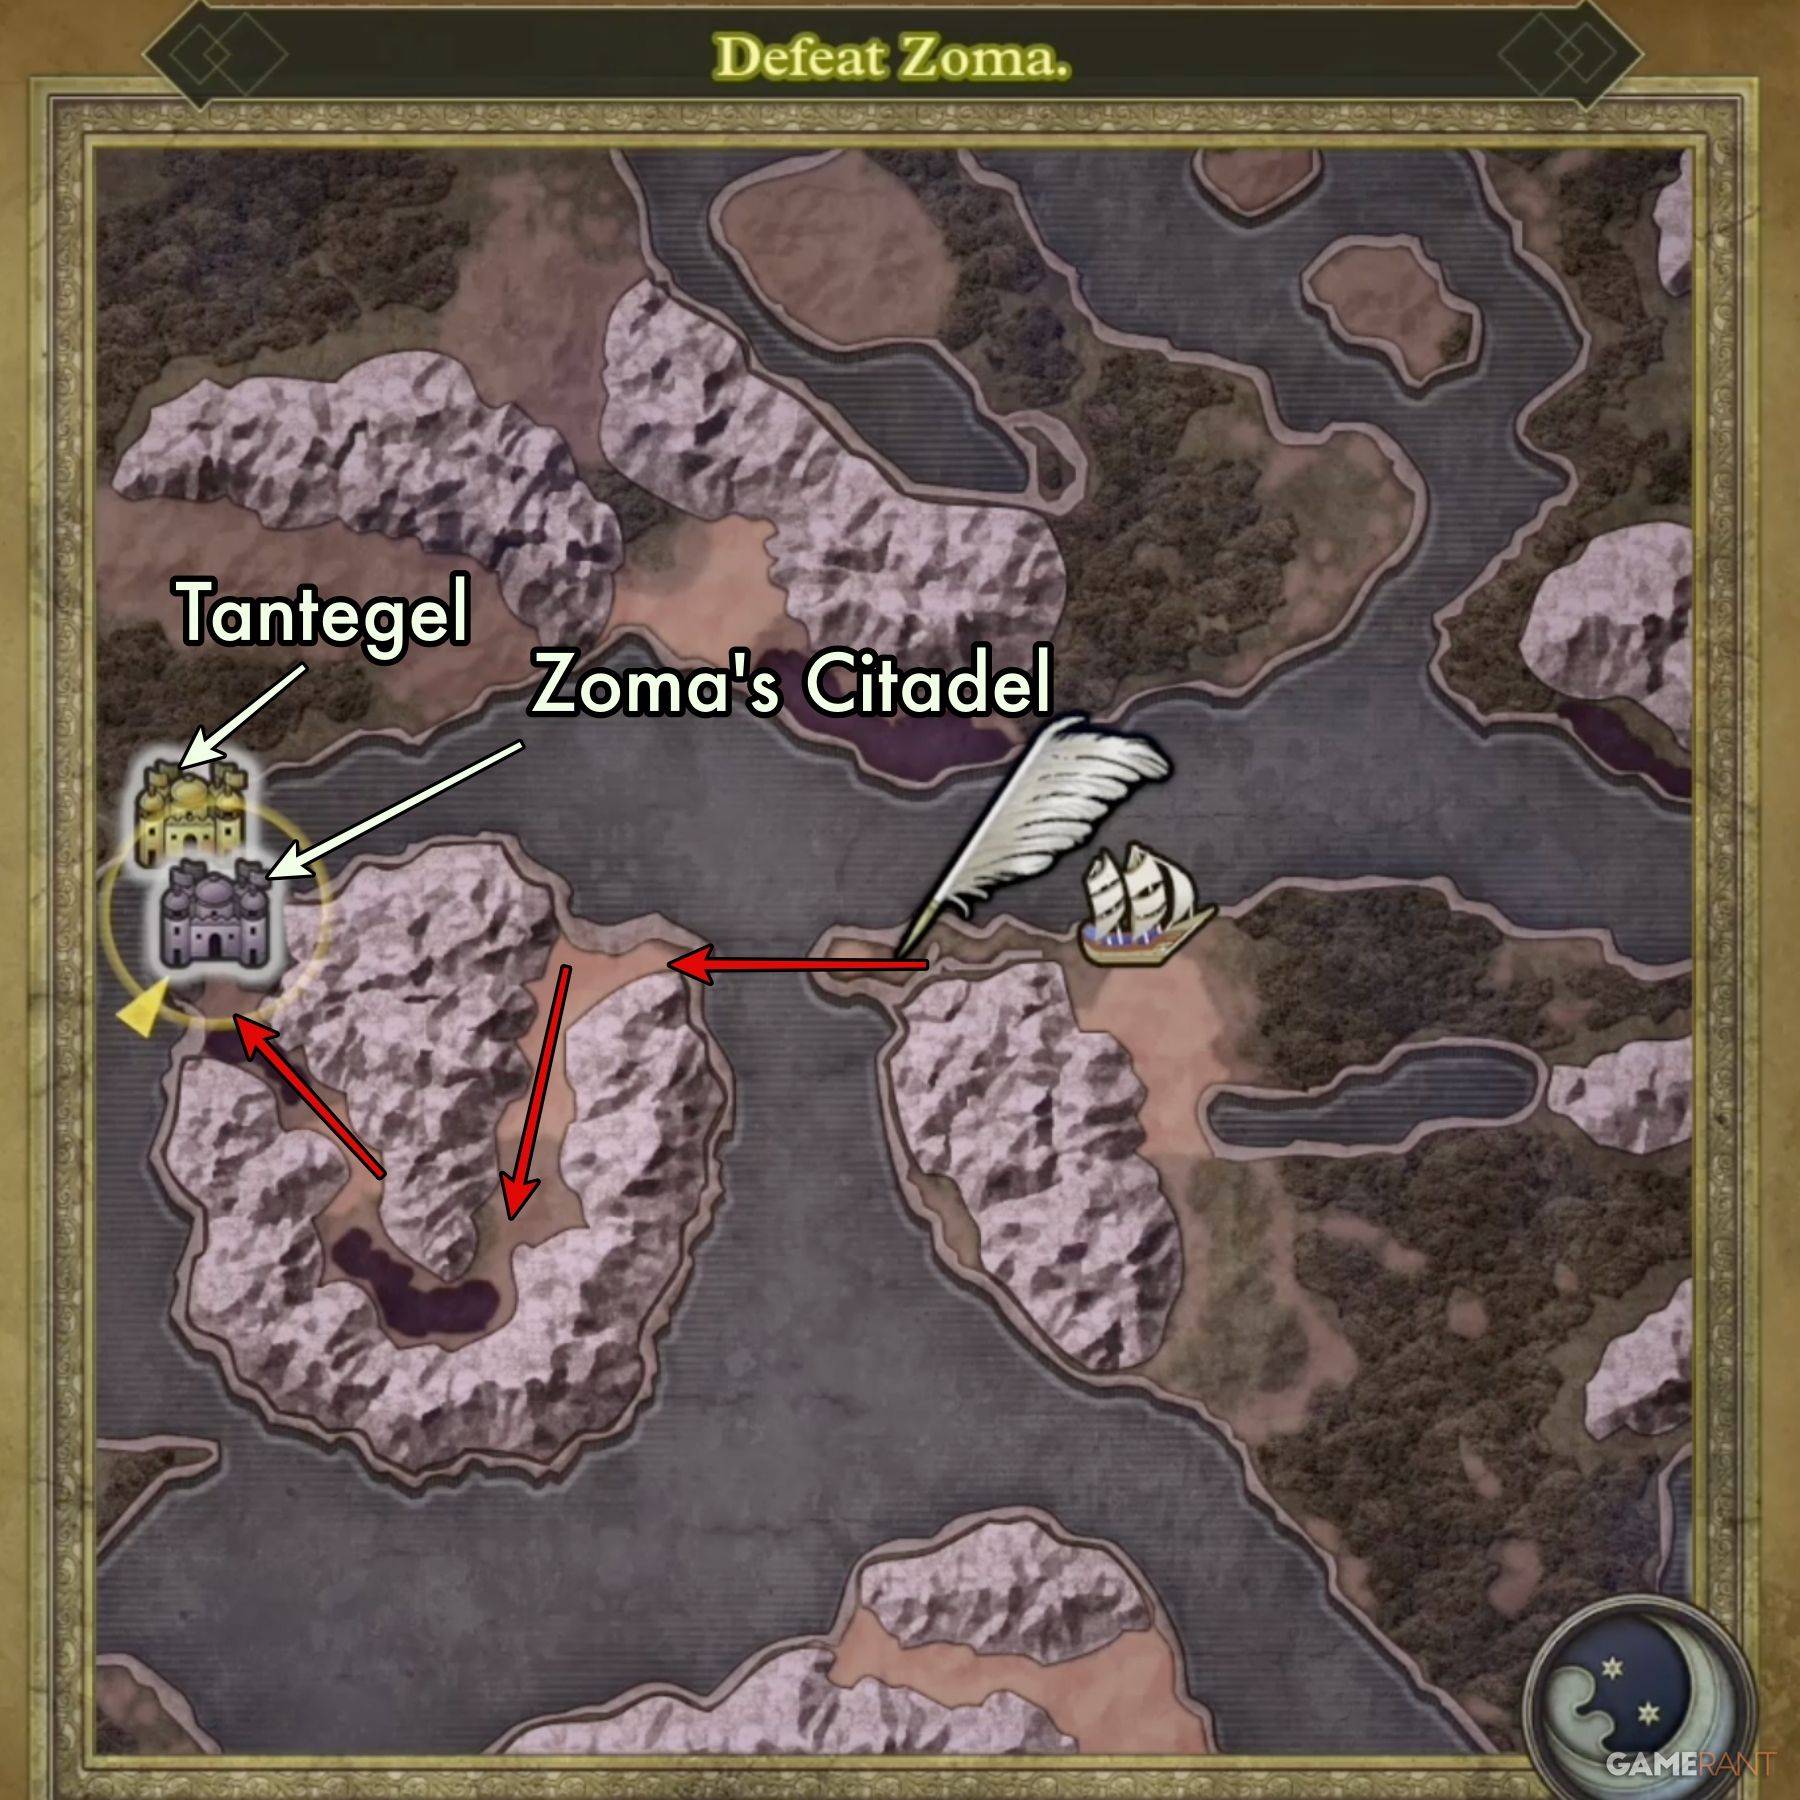 Upon defeating the Archfiend Baramos in DQIII Remake, you'll step into the perpetually dark world of Alefgard. Zoma's Citadel stands as your ultimate destination on this new map. To reach it, you'll need to assemble the Rainbow Drop, which consists of three key items:
- Sunstone – Found in Tantegel Castle
- Staff of Rain – Located in the Shrine of the Spirit
- Sacred Amulet – Gifted by Rubiss after you free her at the top of the Tower of Rubiss (you'll need the Faerie Flute for this)
Once you've gathered all three items, you can combine them to form the Rainbow Drop. This magical artifact will enable you to create the Rainbow Bridge, leading you directly to Zoma's Citadel.
Zoma's Citadel 1F Walkthrough – Dragon Quest 3 Remake
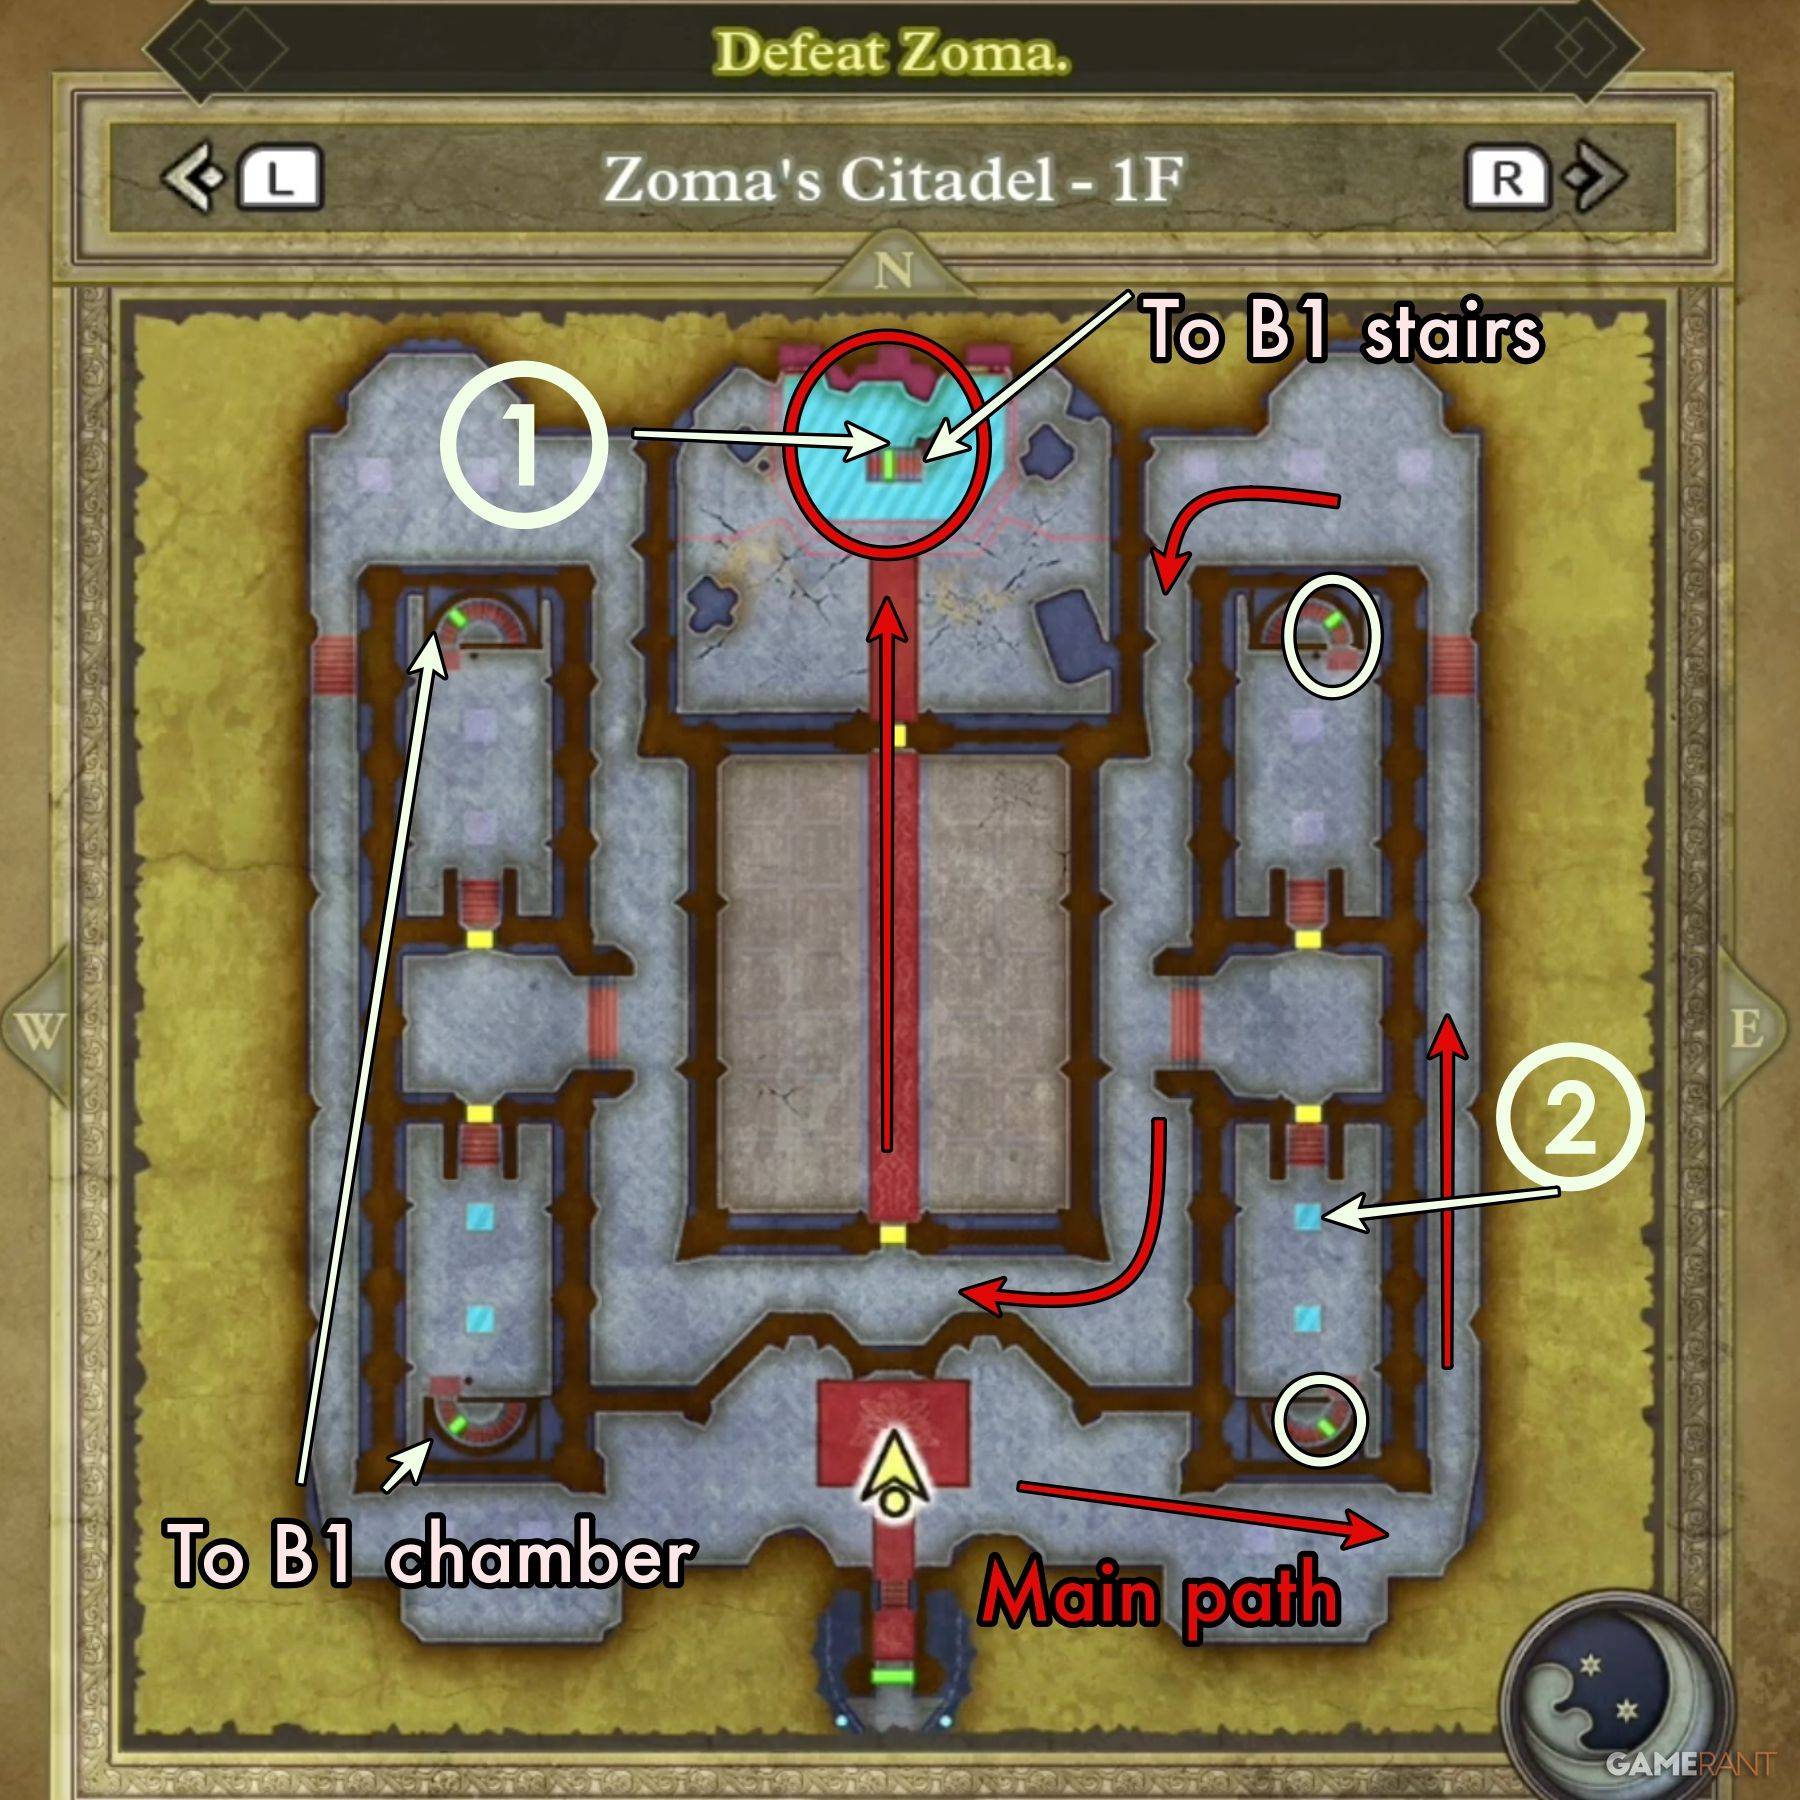 ### 1F Main Path:
Your objective on the first floor is to reach the throne positioned near the center of the northern wall. This throne will move, revealing a hidden passage. To get there, navigate around either the east or west side of the chamber, then return to the door of the central chamber. Refer to the map above for the exact route. Be sure to explore the side chambers for treasures, detailed below.
Upon entering the central chamber, you'll encounter a series of Living Statue variants. These enemies have no specific weaknesses and can be quite challenging. Approach them as you would any boss fight, and you should manage just fine.
All Treasure on Zoma's Citadel 1F:
- Treasure 1 (Buried): Mini Medal – Located behind the throne.
- Treasure 2 (Buried): Seed of Magic – Found by checking the electrified panel.
Zoma's Citadel B1 Walkthrough – Dragon Quest 3 Remake
 ### B1 Main Path and B1 Treasure:
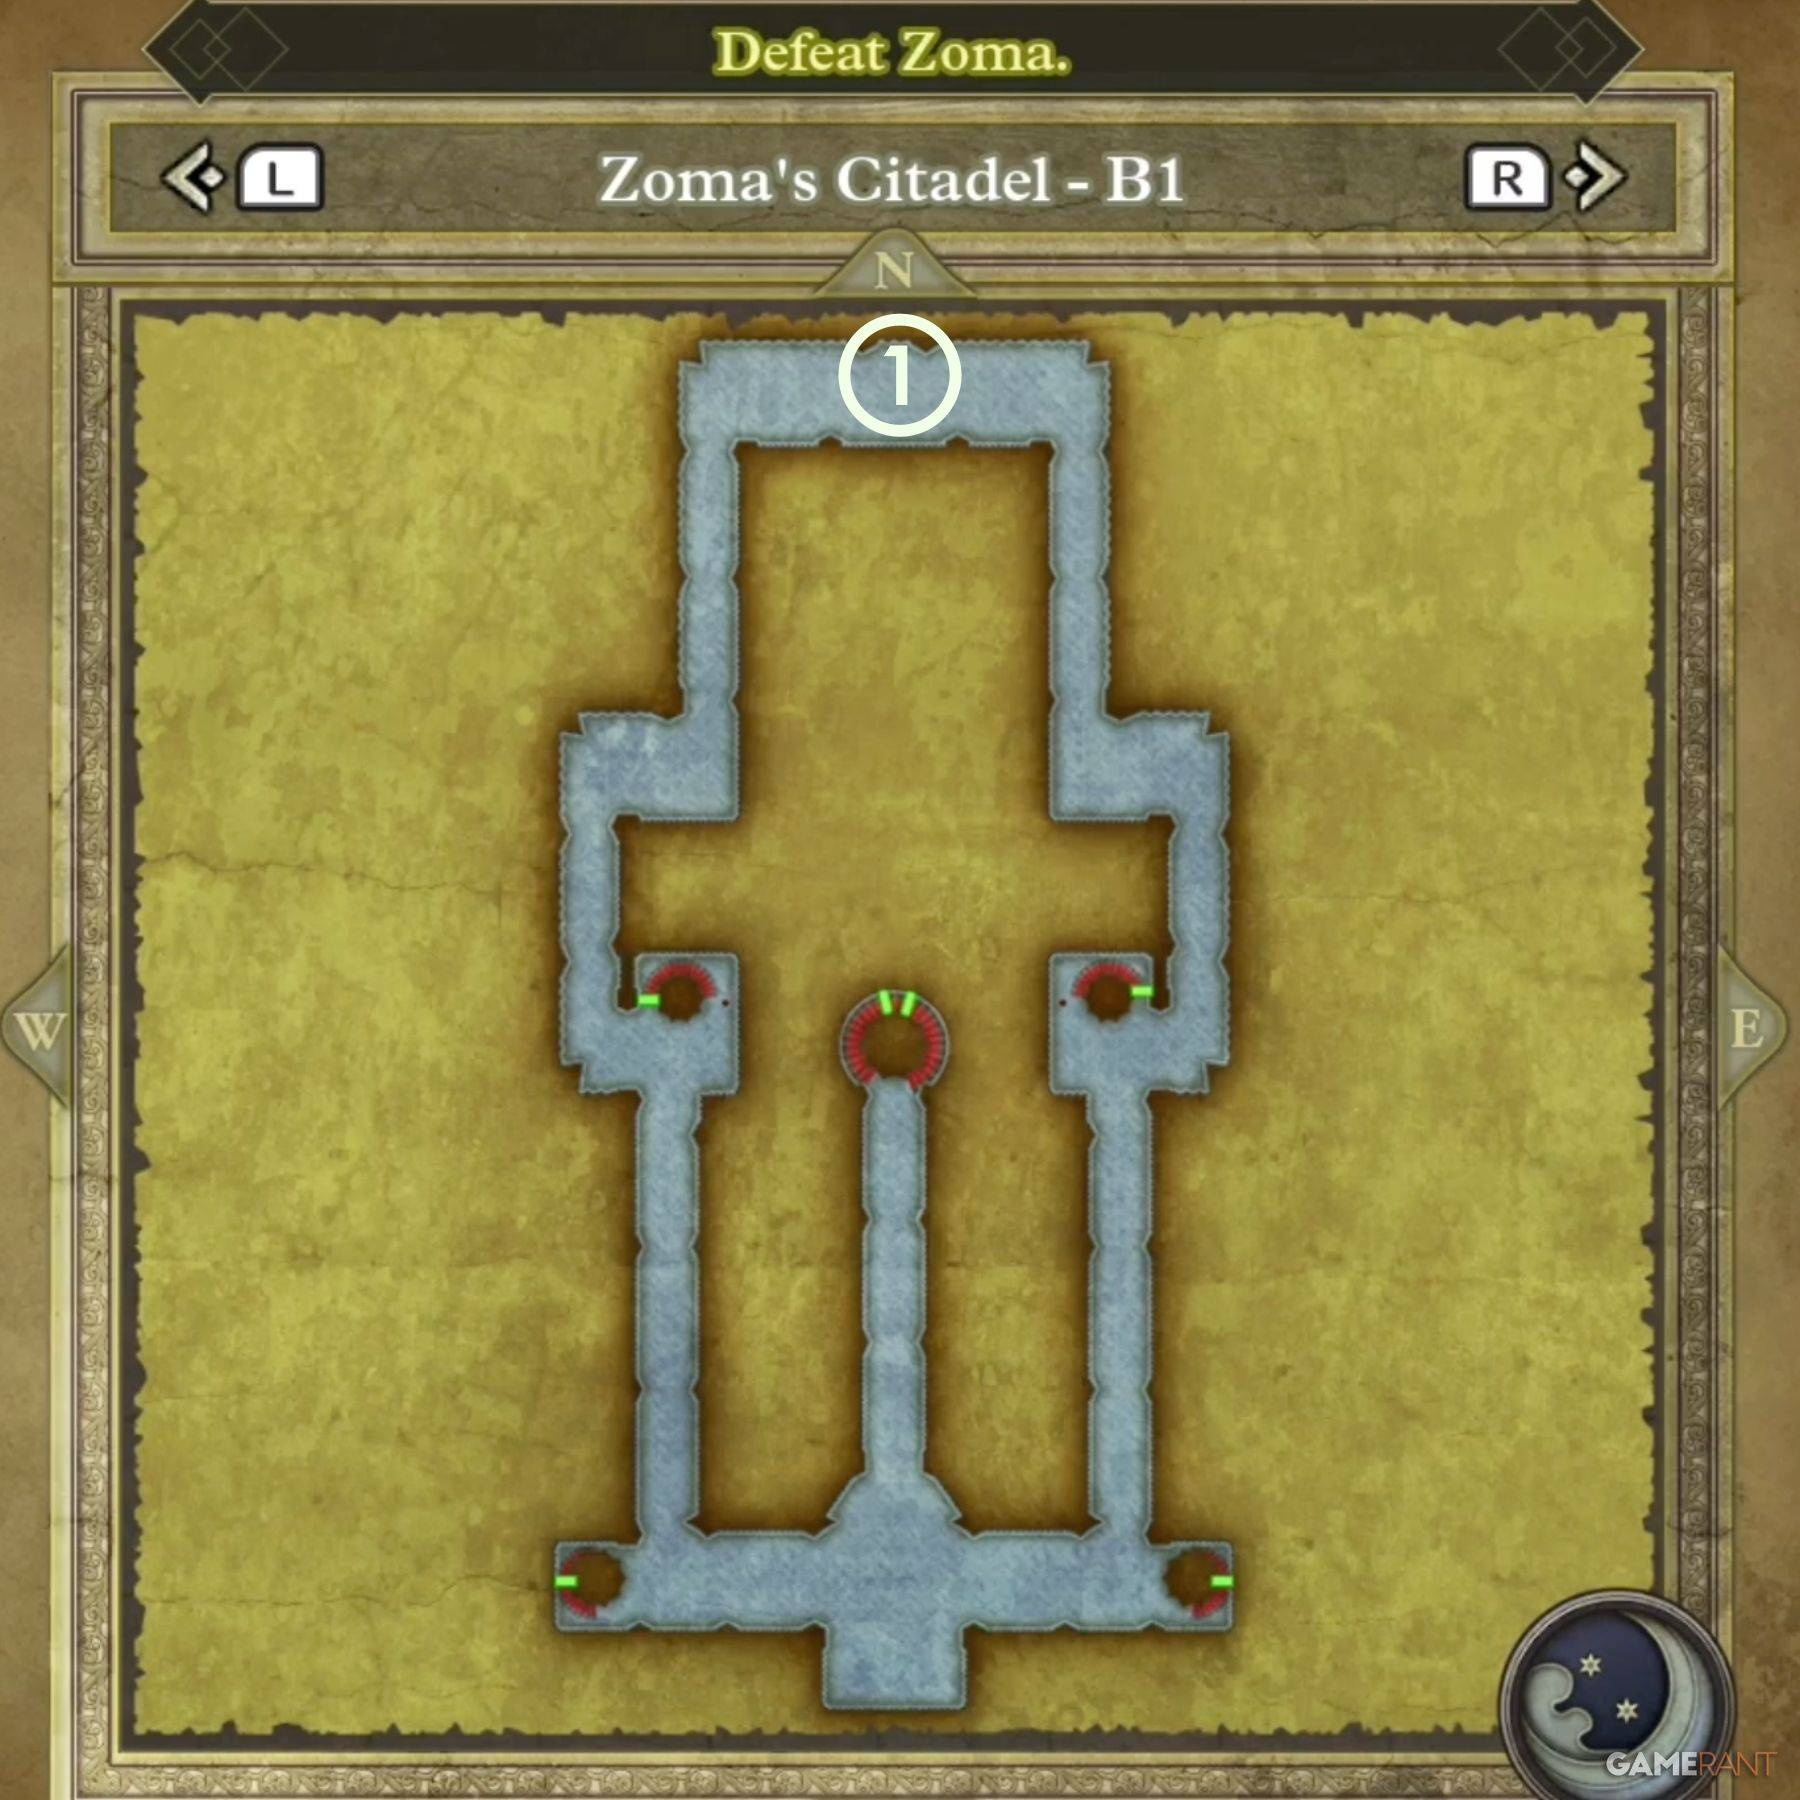
Taking the main path under the throne leads directly to B2. However, if you use any of the four stair sets in the small chambers on 1F, you'll end up in the isolated B1 chamber. The only reason to venture here is to claim the treasure chest along the northern wall:
- Treasure 1 (Chest): Hapless Helm
Zoma's Citadel B2 Walkthrough – Dragon Quest 3 Remake
 ### B2 Main Path:
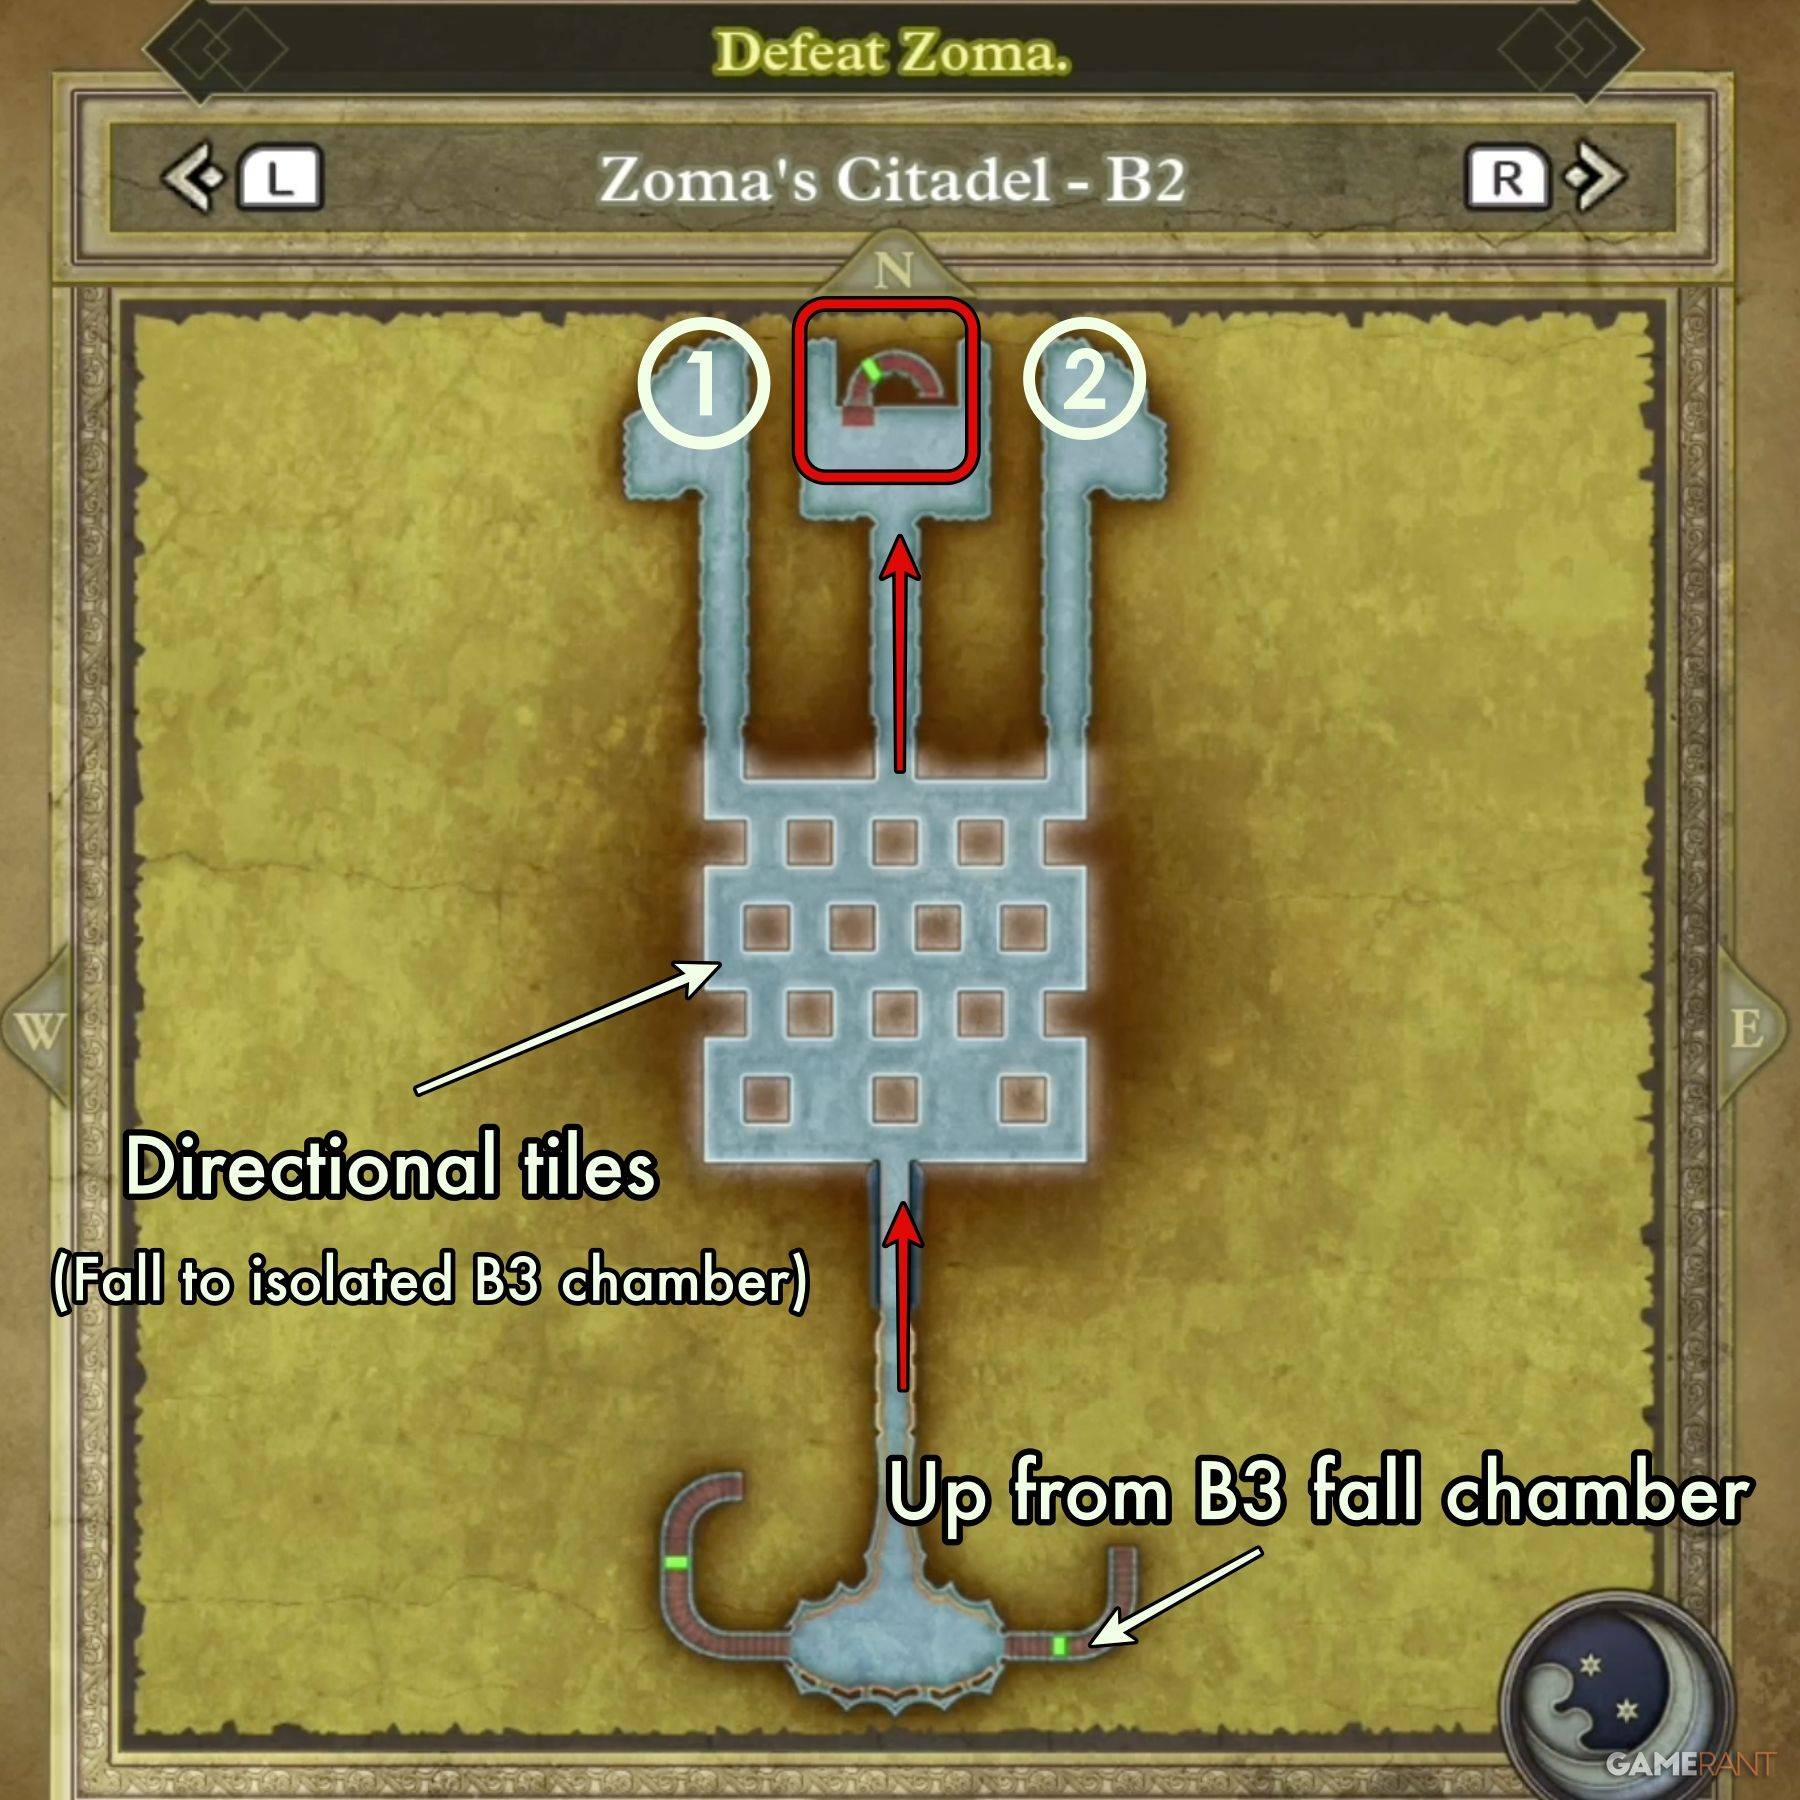
Upon descending from B1, you'll find yourself on B2. Here, you must navigate the directional tiles in the center section to reach the path directly opposite the entrance, then proceed down the stairs. These tiles can be tricky, so we've dedicated a section to help you master them.
How to Use the Directional Tiles in Dragon Quest 3 Remake:
The directional tiles on level B2 are notoriously challenging. They seem illogical at first, but there's a pattern to follow. If you're struggling, consider practicing at the Tower of Rubiss. In the northwest corner of its third floor, you'll find similar tiles designed for practice.
The tiles feature a diamond shape pointing east and west, with the orange and blue halves frequently changing. Pay attention to the colors to determine your input.
When moving North or South, consider the diamond's halves as the left and right buttons on the D-Pad:
- Blue = North: If the blue half is on the left, press left to move north. If it's on the right, press right.
- Orange = South: If the orange half is on the left, press left to move south. If it's on the right, press right.
For East or West movement, view the diamond as arrows pointing in both directions. Focus solely on the orange arrow:
- If the orange arrow points in the direction you want to go, press UP on the D-Pad.
- If it points away from your desired direction, press DOWN. Refer to the accompanying video if you need further guidance.
All Treasure on Zoma's Citadel B2:
- Treasure 1 (Chest): Scourge Whip
- Treasure 2 (Chest): 4,989 Gold Coins
Zoma's Citadel B3 Walkthrough – Dragon Quest 3 Remake
 ### B3 Main Path:
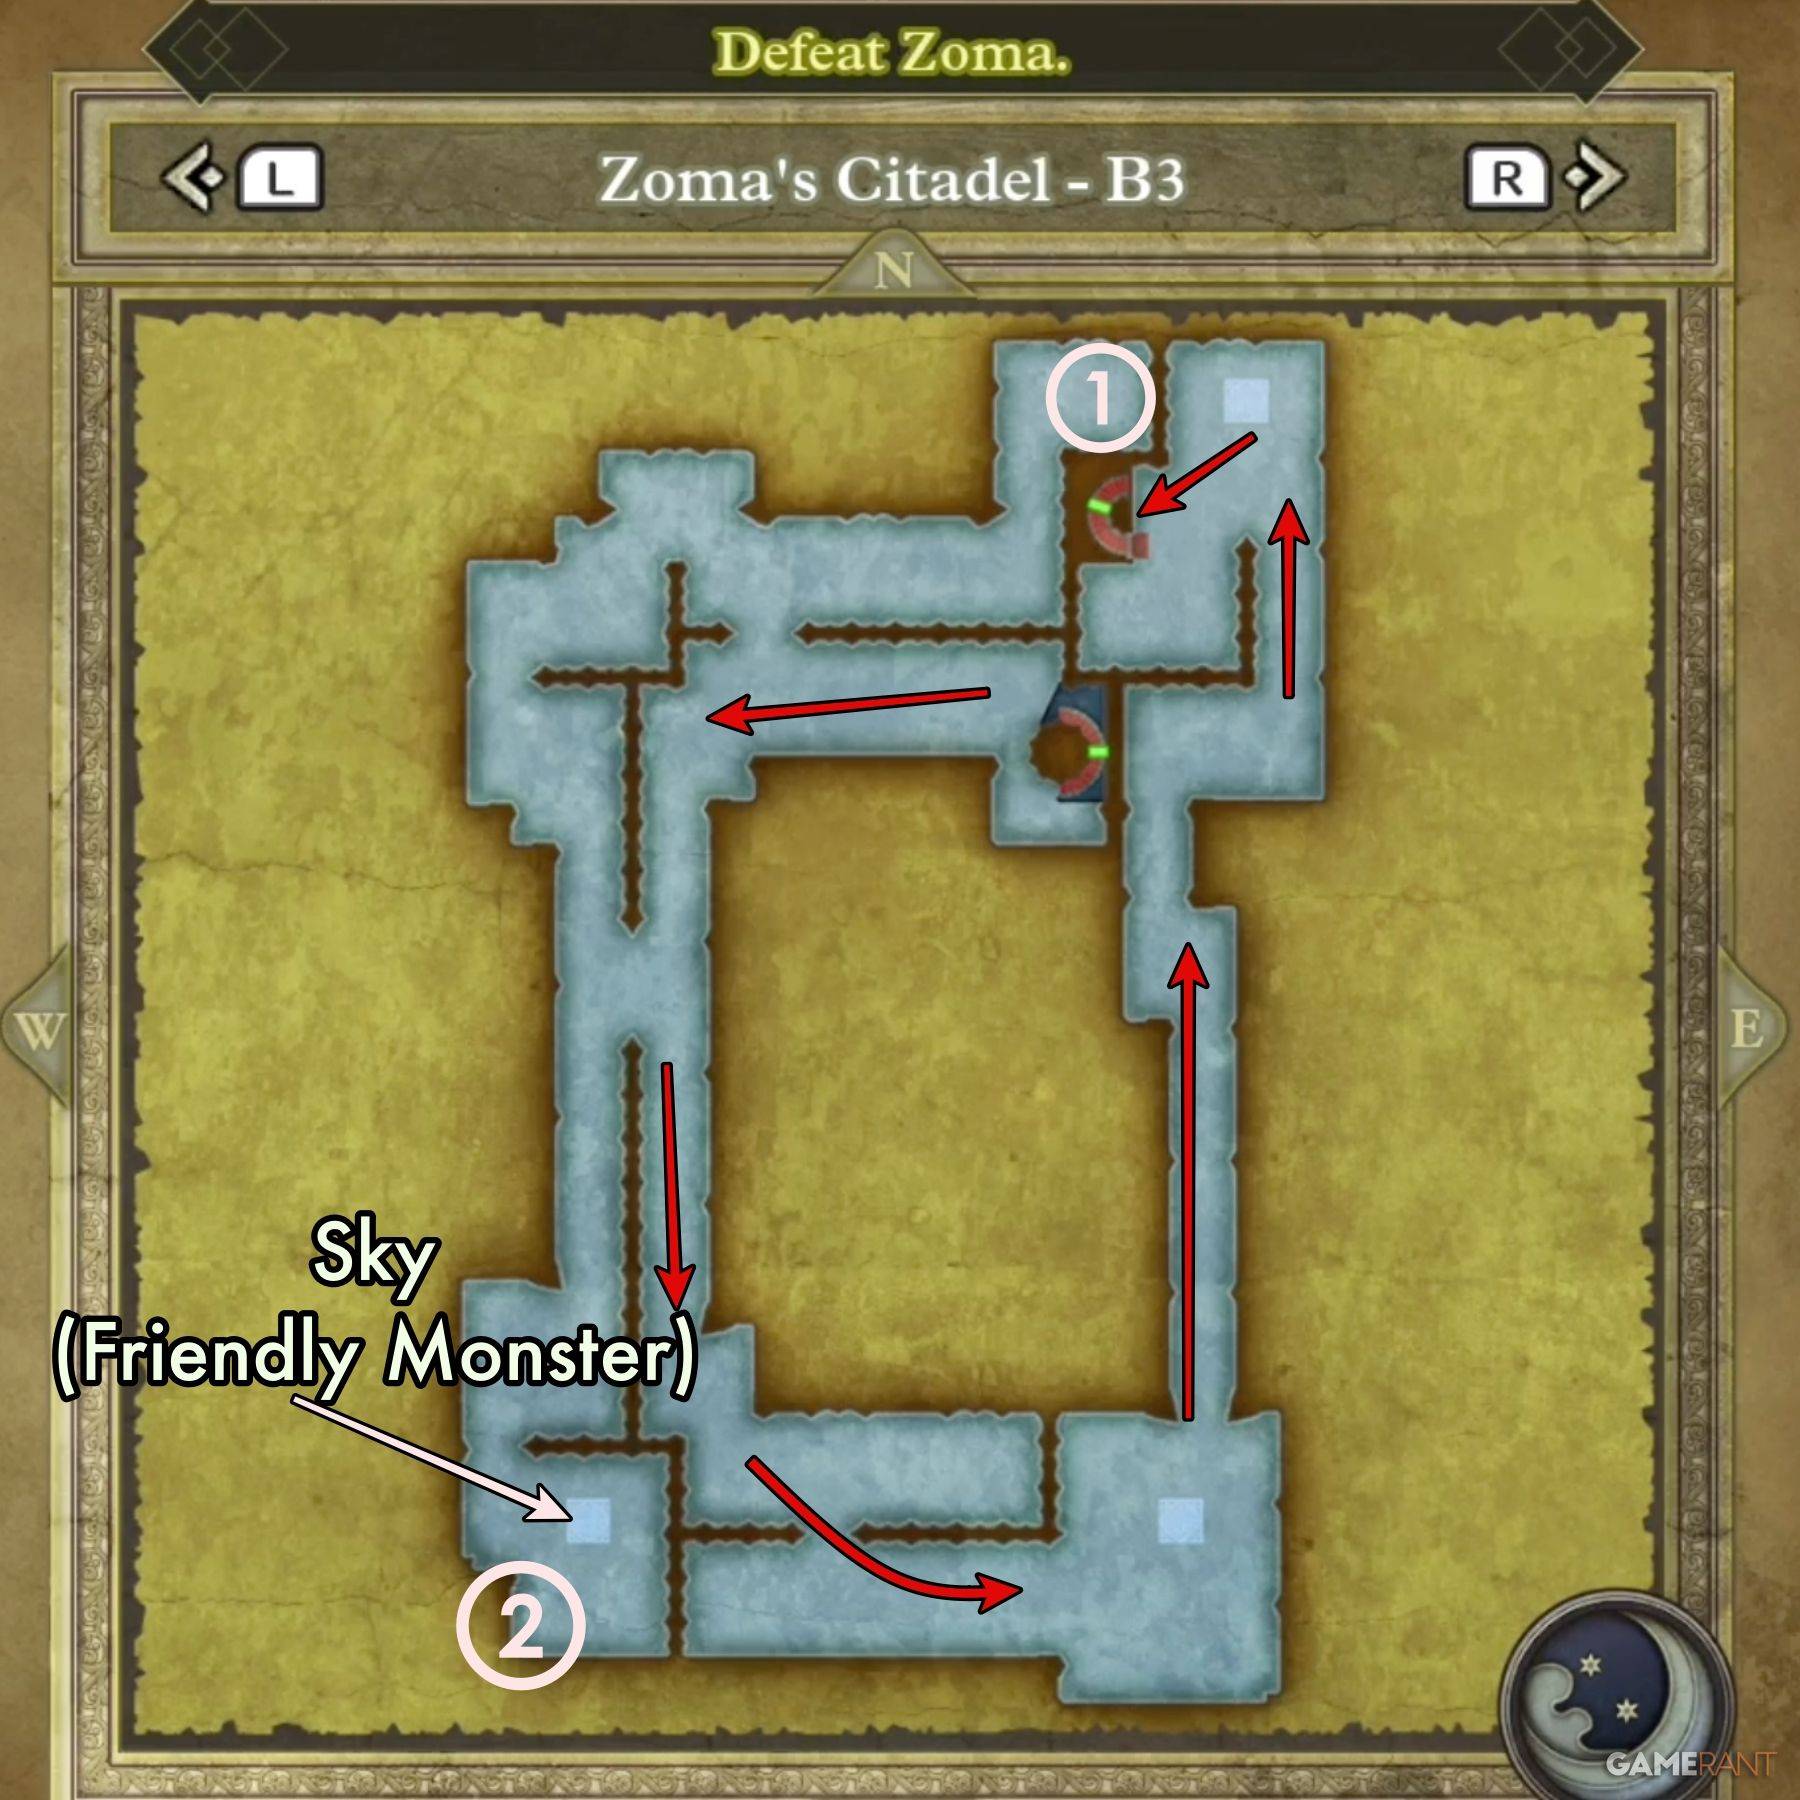
The main route on the third basement level circles the outer edge of the square-shaped chamber. A slight detour to the southwest corner leads to Sky, a Soaring Scourger, and one of DQIII Remake's Friendly Monsters.
B3 Isolated Chamber:
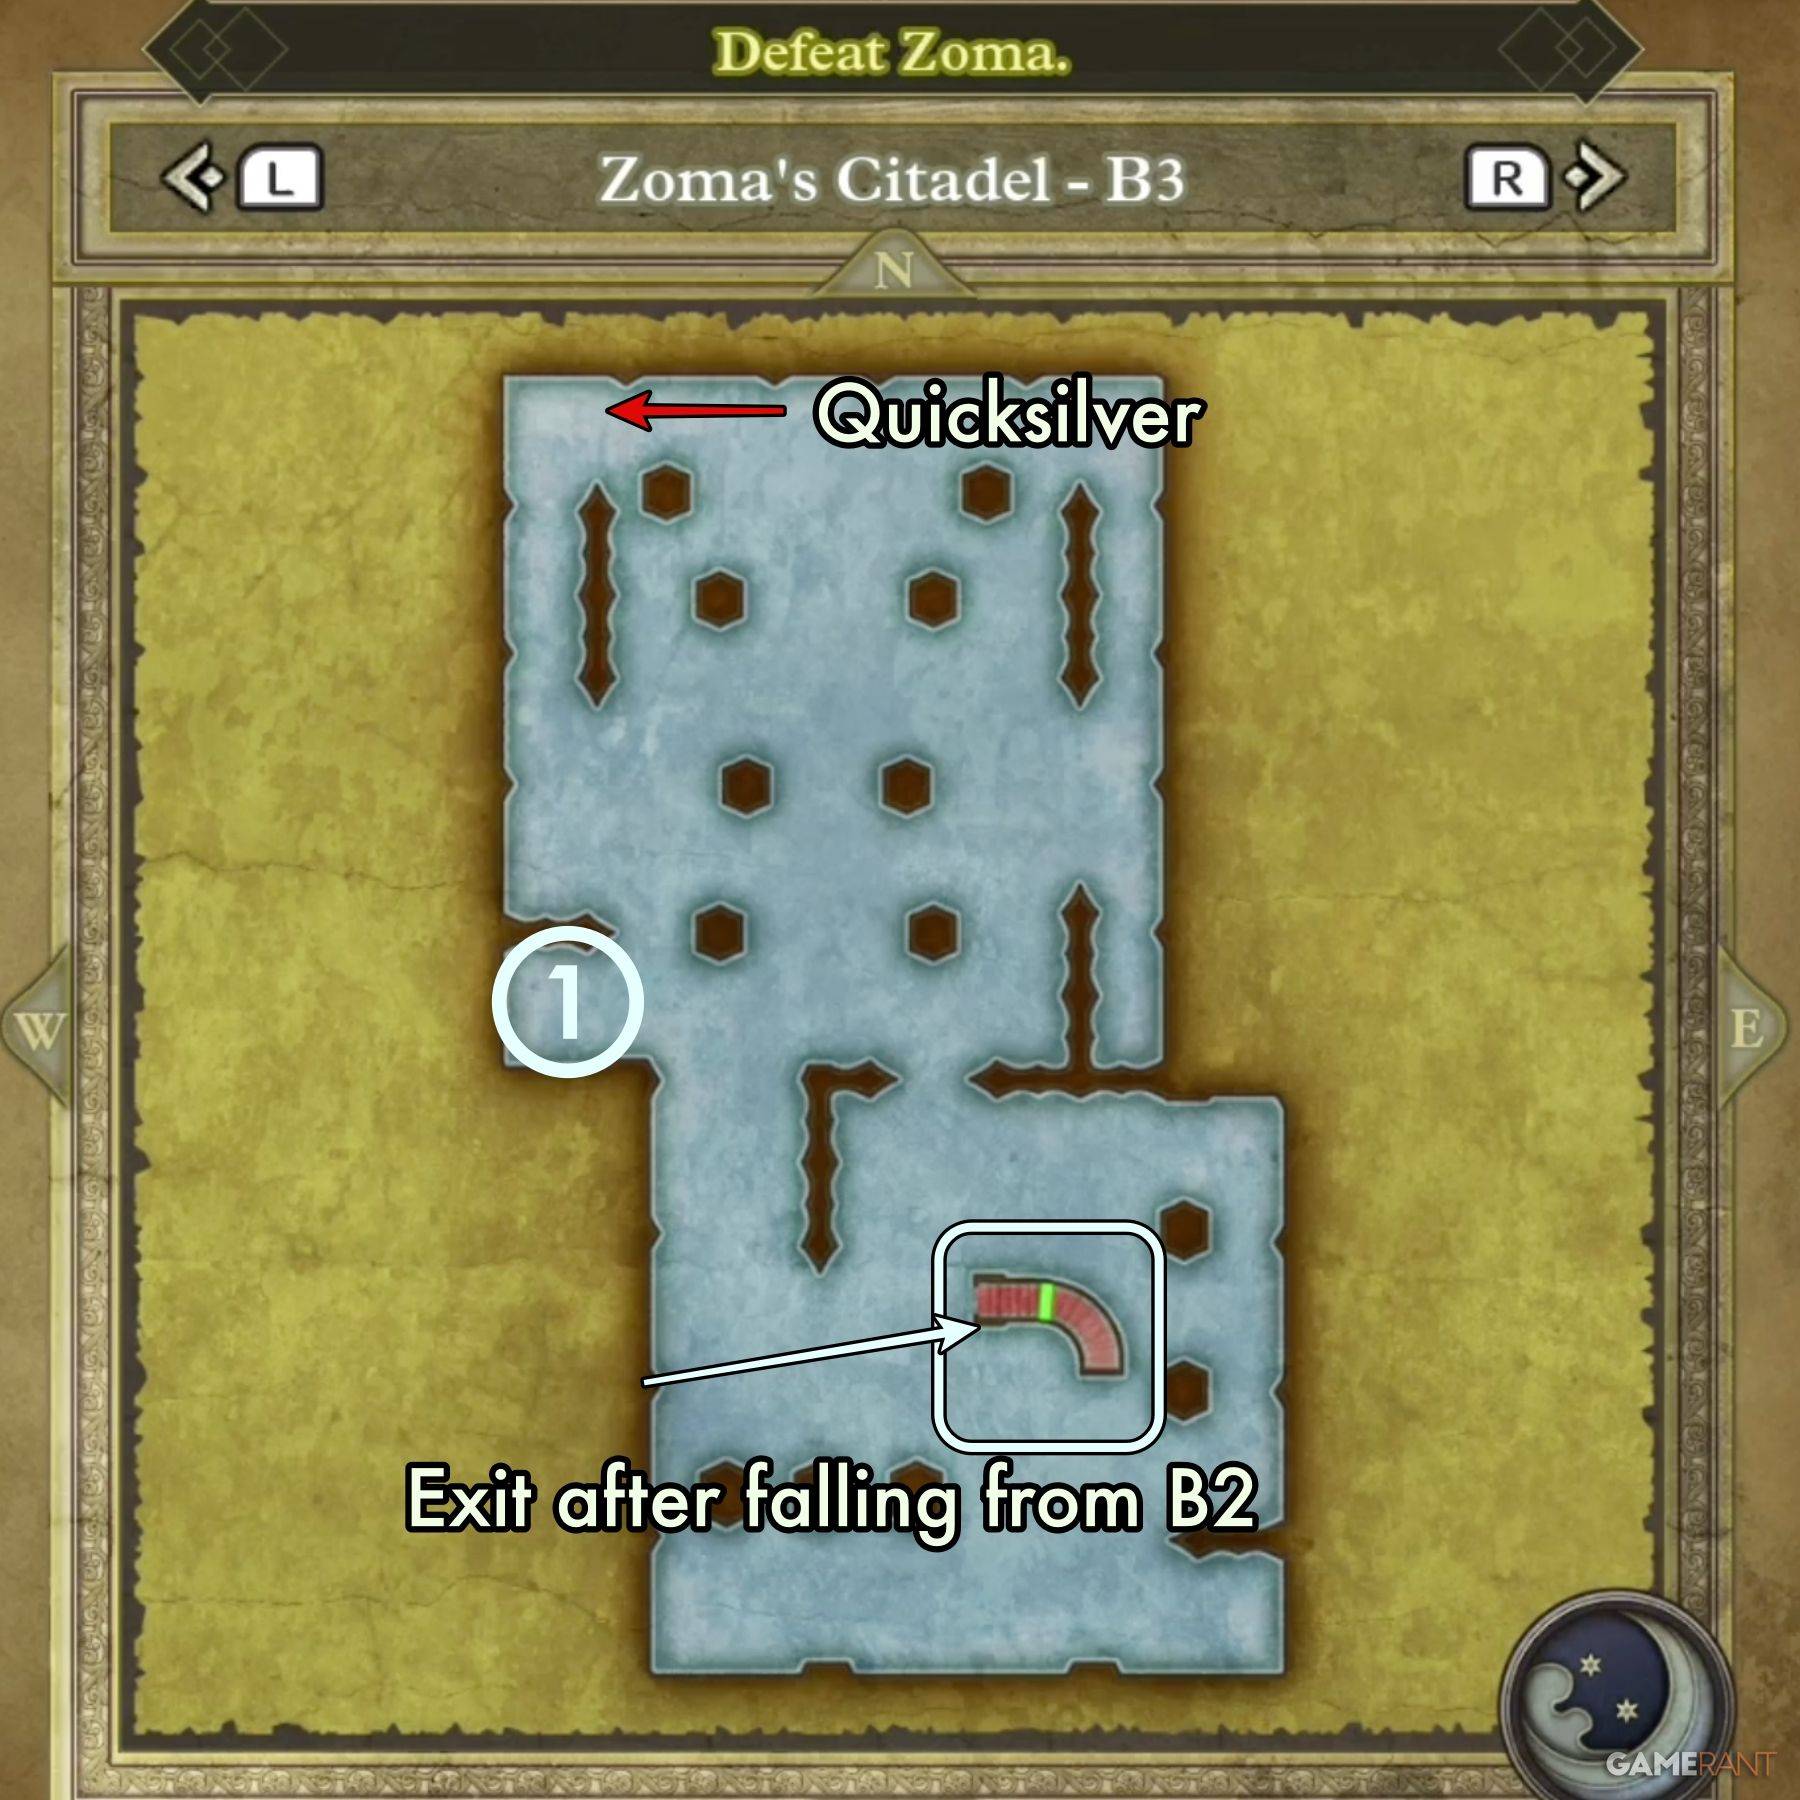 If you fall into one of the holes while navigating the directional tiles on B2, you'll end up in this isolated section of B3. Here, you'll find a friendly Liquid Metal Slime in the northwest corner. Exit via the stairs on the eastern side.
All Treasure on Zoma's Citadel B3:
Main Chamber:
- Treasure 1 (Chest): Dragon Dojo Duds
- Treasure 2 (Chest): Double-Edged Sword
Isolated Chamber:
- Treasure 1 (Chest): Bastard Sword
Zoma's Citadel B4 Walkthrough – Dragon Quest 3 Remake
 ### B4 Main Path:
The fourth basement level is the last before you confront Zoma. Start from the center of the southern area, navigate up and around, then head back down to the southeastern corner to reach the exit.
Don't miss the special cutscene that plays upon entering B4; it's worth watching in full.
All Treasure on Zoma's Citadel B4:
There are six chests in one chamber, listed from right to left:
- Treasure 1 (Chest): Shimmering Dress
- Treasure 2 (Chest): Prayer Ring
- Treasure 3 (Chest): Sage's Stone
- Treasure 4 (Chest): Yggdrasil Leaf
- Treasure 5 (Chest): Dieamend
- Treasure 6 (Chest): Mini Medal
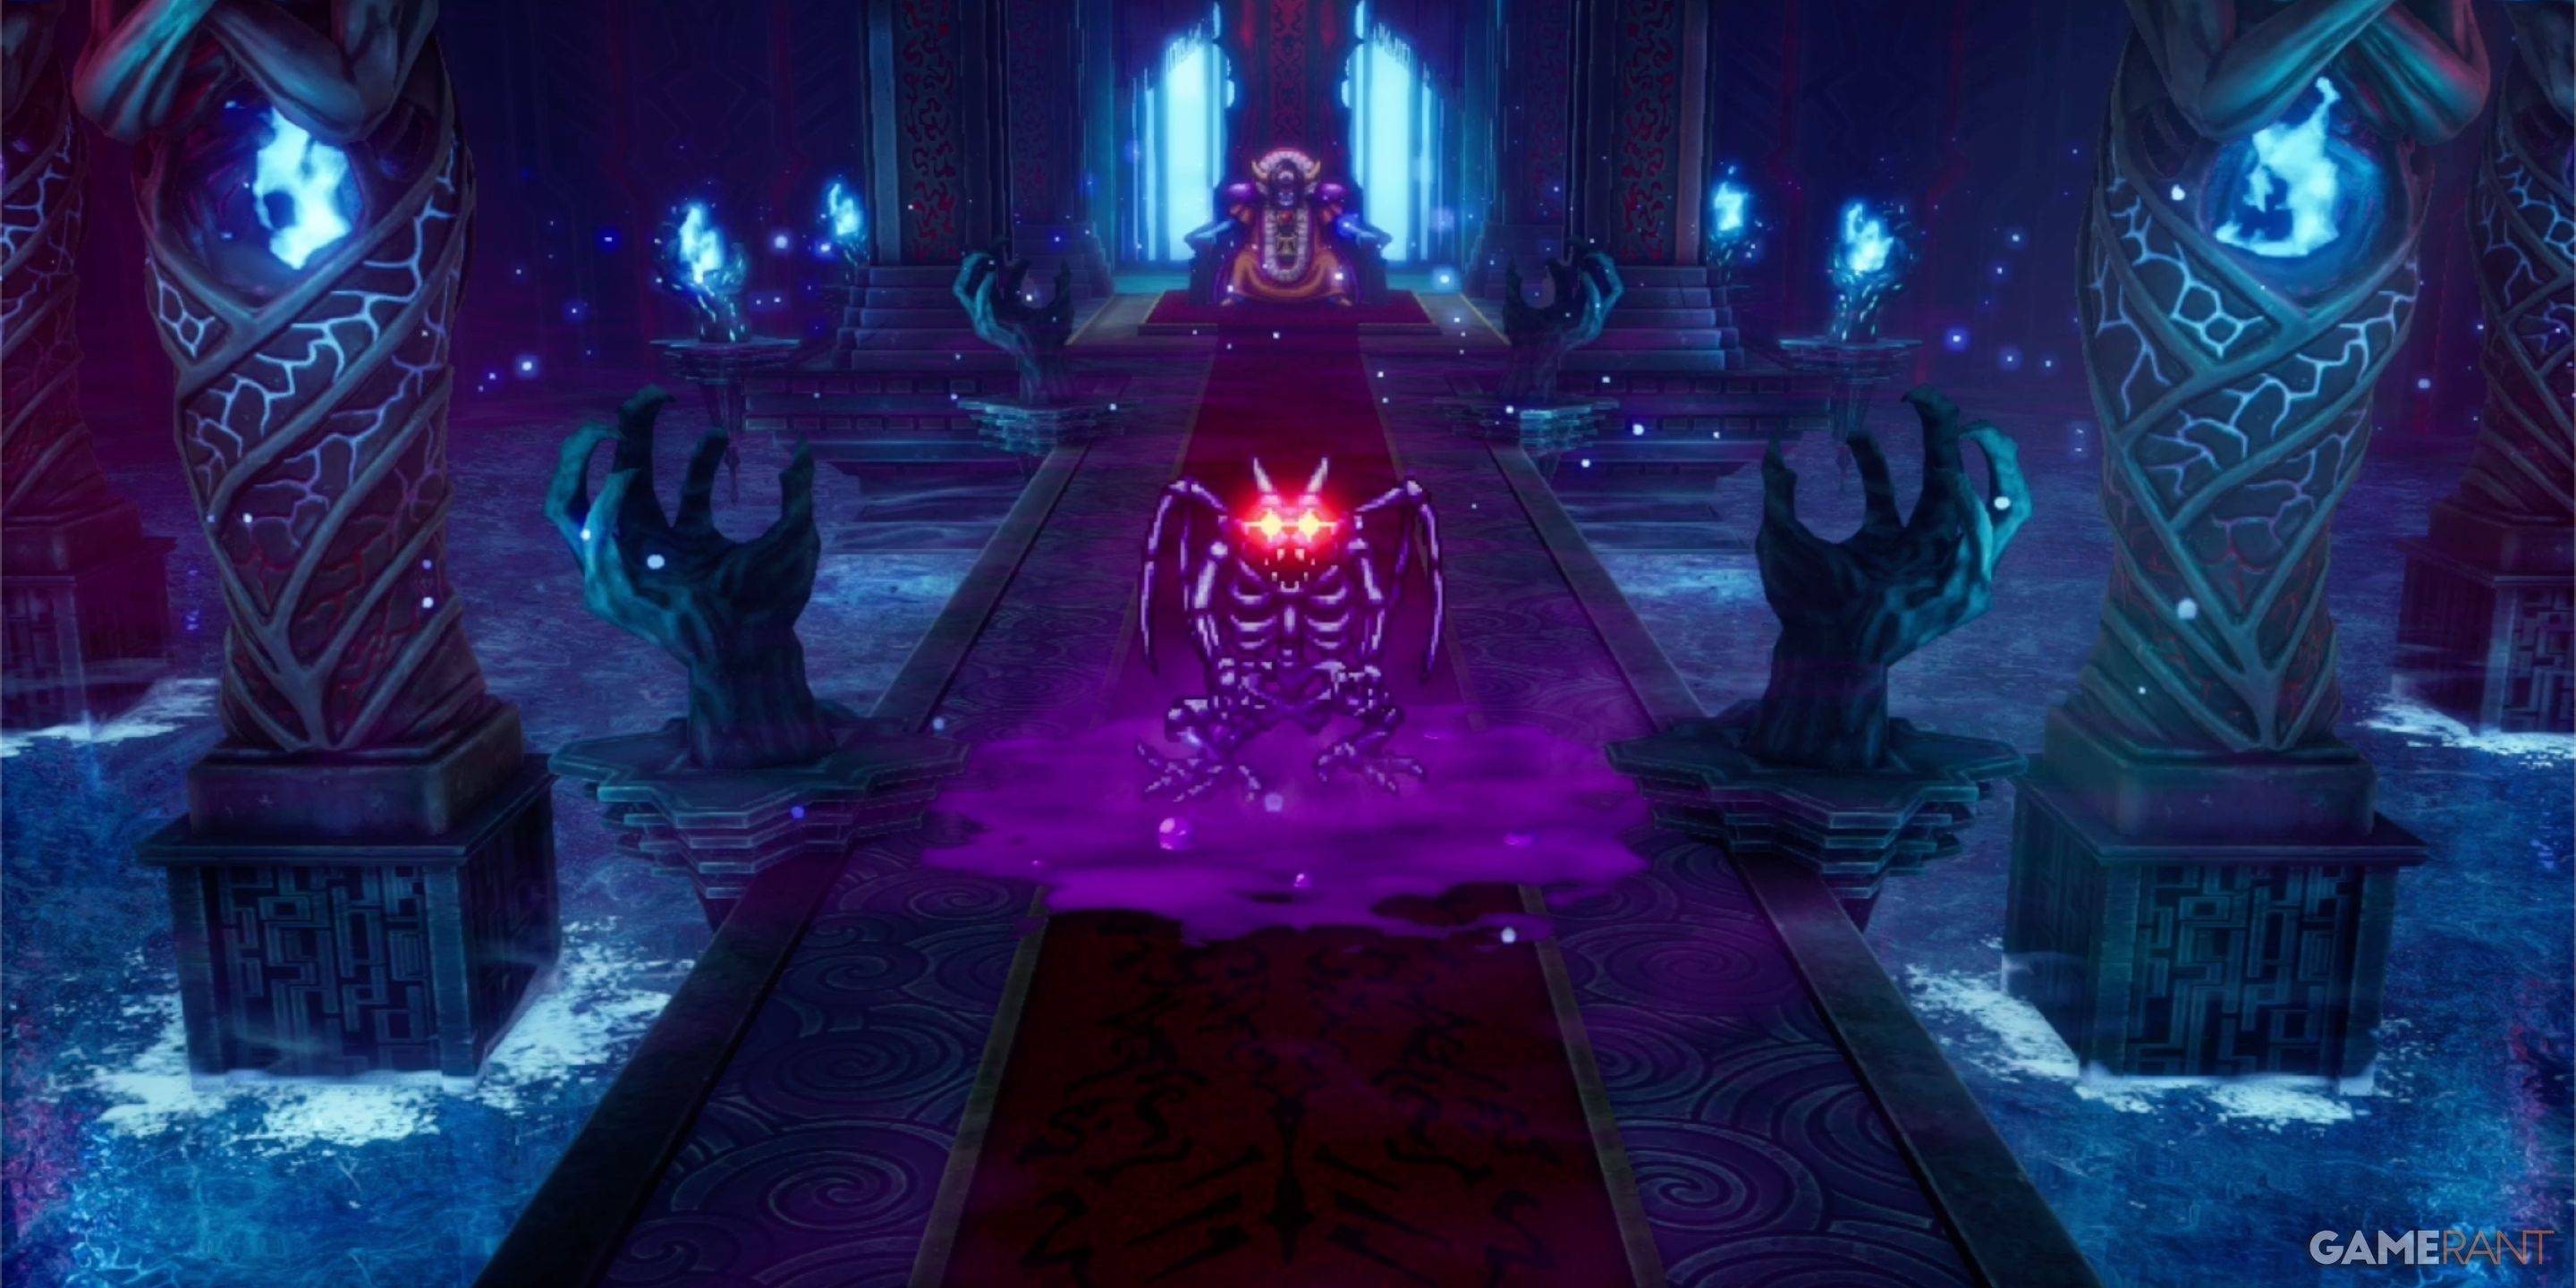
How to Defeat Zoma in Dragon Quest 3 Remake
 Before facing Zoma, you must navigate a boss gauntlet featuring the King Hydra, the Soul of Baramos, and the Bones of Baramos. Thankfully, you can use items from your bag between fights, so you're not limited to just your personal inventory.
How to Defeat the King Hydra:
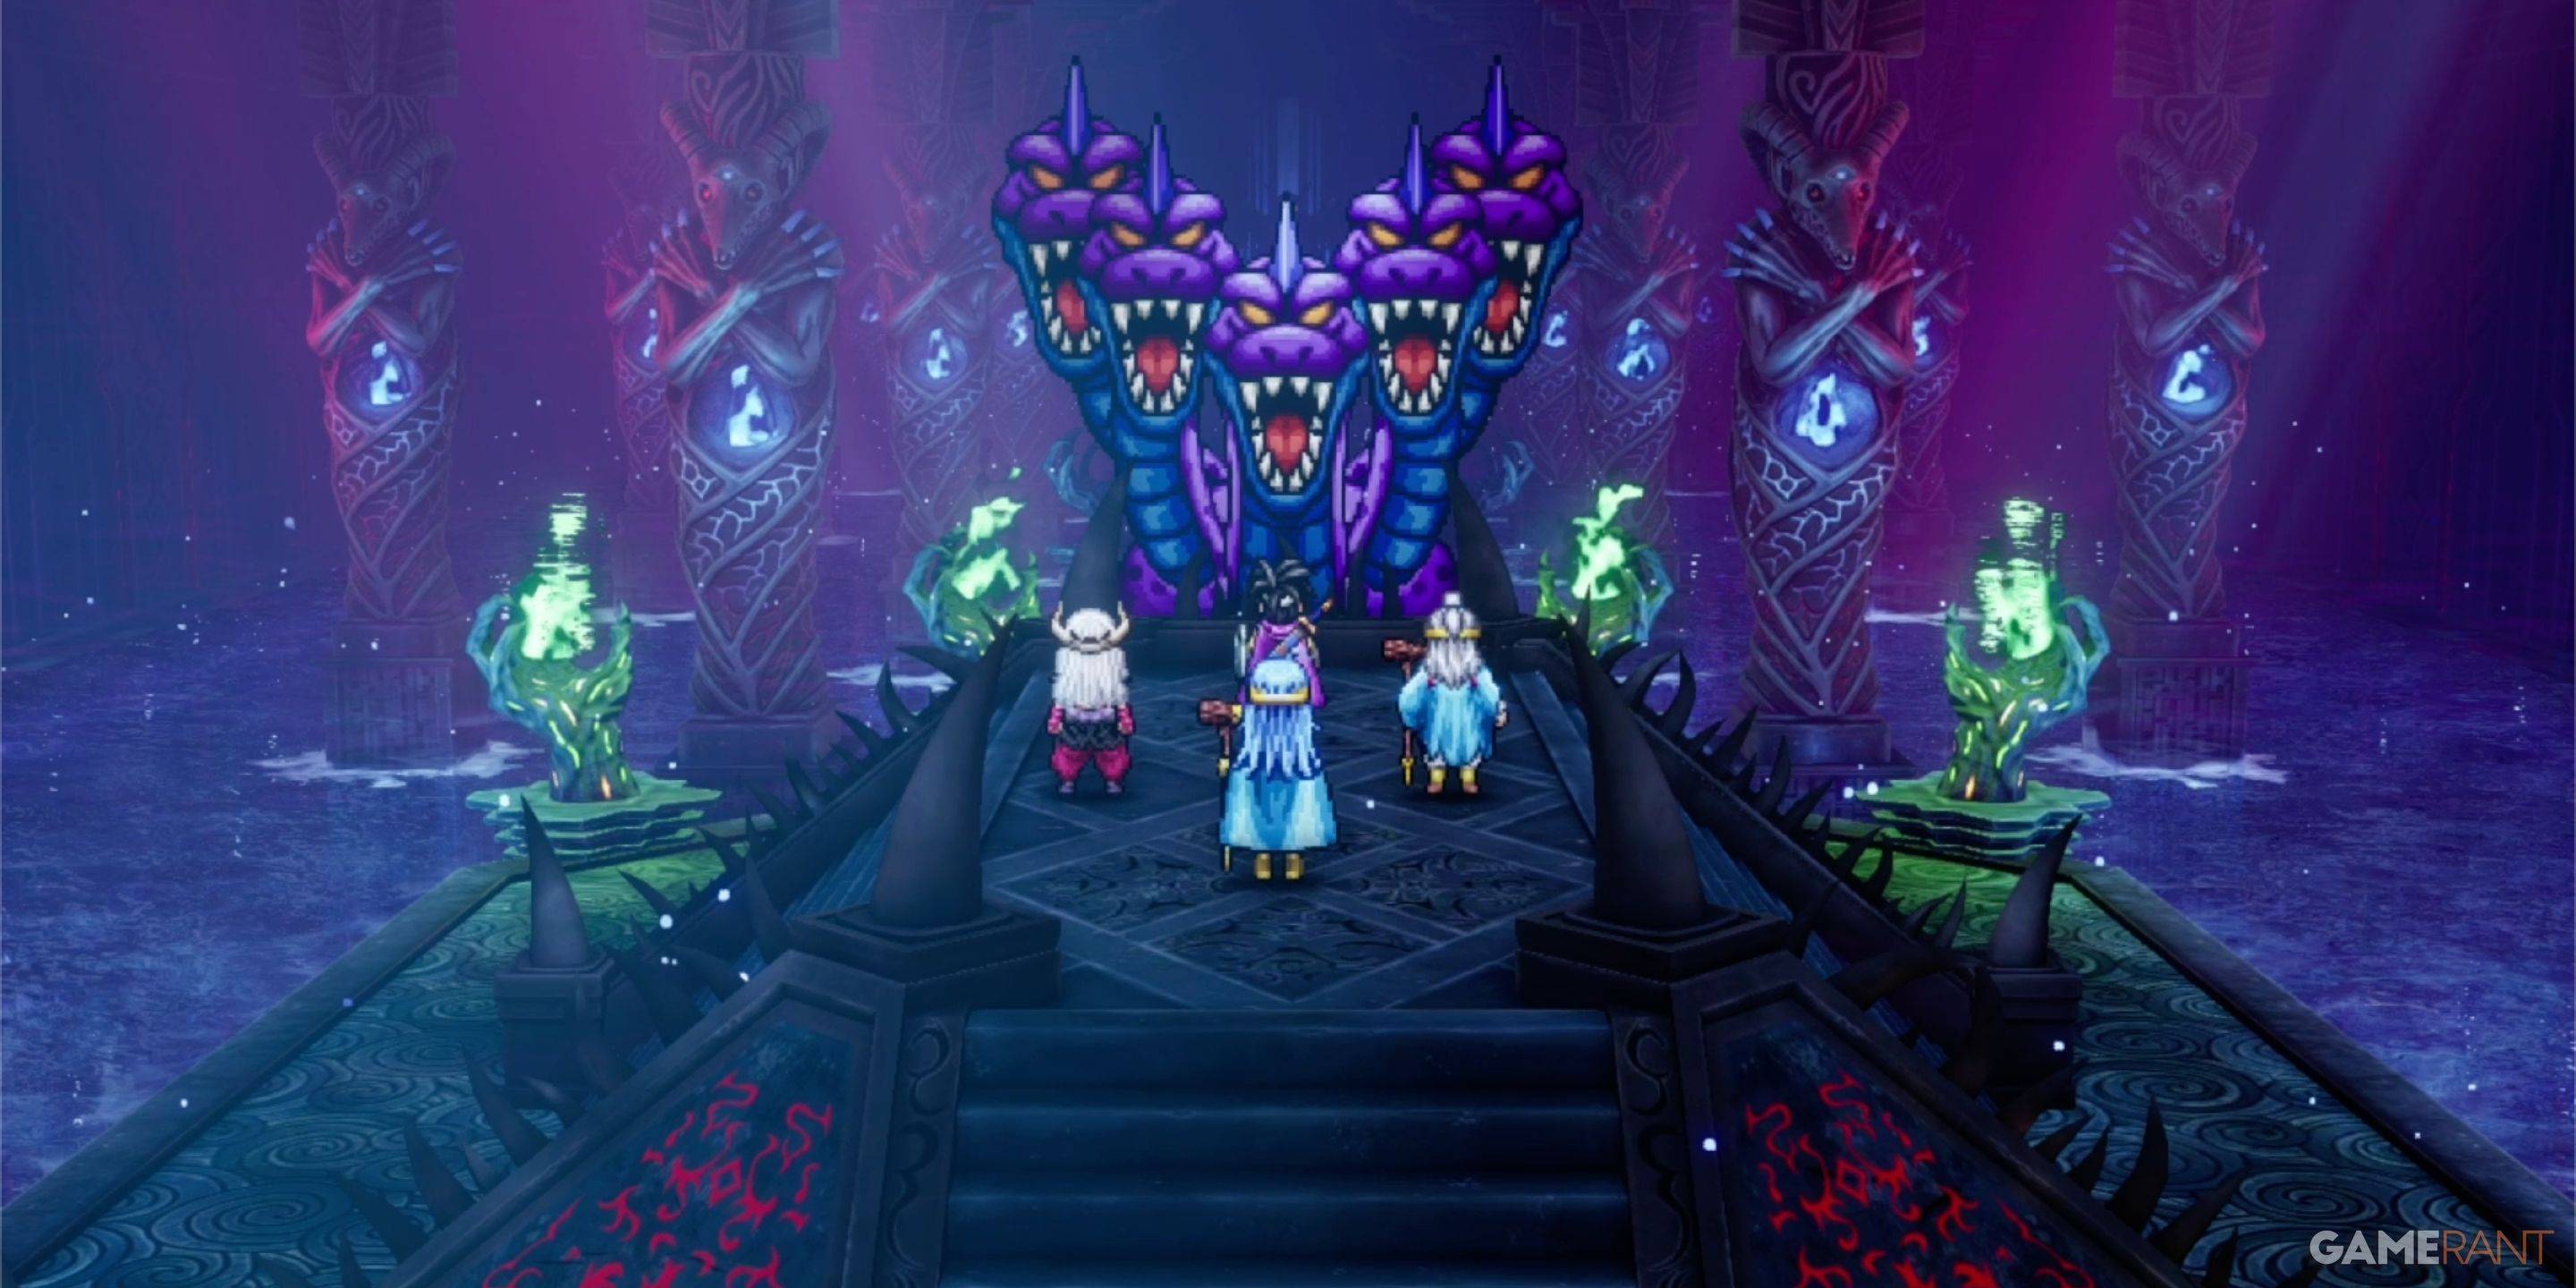 King Hydra is a formidable foe akin to a low-level main boss. We found no red-damage weaknesses, but the Kazap spell proved highly effective, dealing over 400 damage per turn. Adopt an aggressive approach, as the King Hydra heals over 100 HP each round. Using a basic boss strategy, with one Sage partially dedicated to healing, should allow you to defeat the King Hydra in one attempt without losing any party members.
How to Defeat the Soul of Baramos:
 Having already faced the Soul of Baramos in the Tower of Rubiss, you should be familiar with the strategy. This enemy is very weak to Zap damage, so focus your Hero's efforts on using Kazap.
How to Defeat the Bones of Baramos:
 Bones of Baramos shares the same vulnerabilities as its predecessor. We quickly dispatched it using the Kazap spell and the Monster Wrangler's Wild Side/Monster Pile-On combo. Be cautious, as the bones hit harder than the Soul of Baramos. Monitor your party's health closely, but with the right strategy, this fight should feel like an extension of the previous battle.
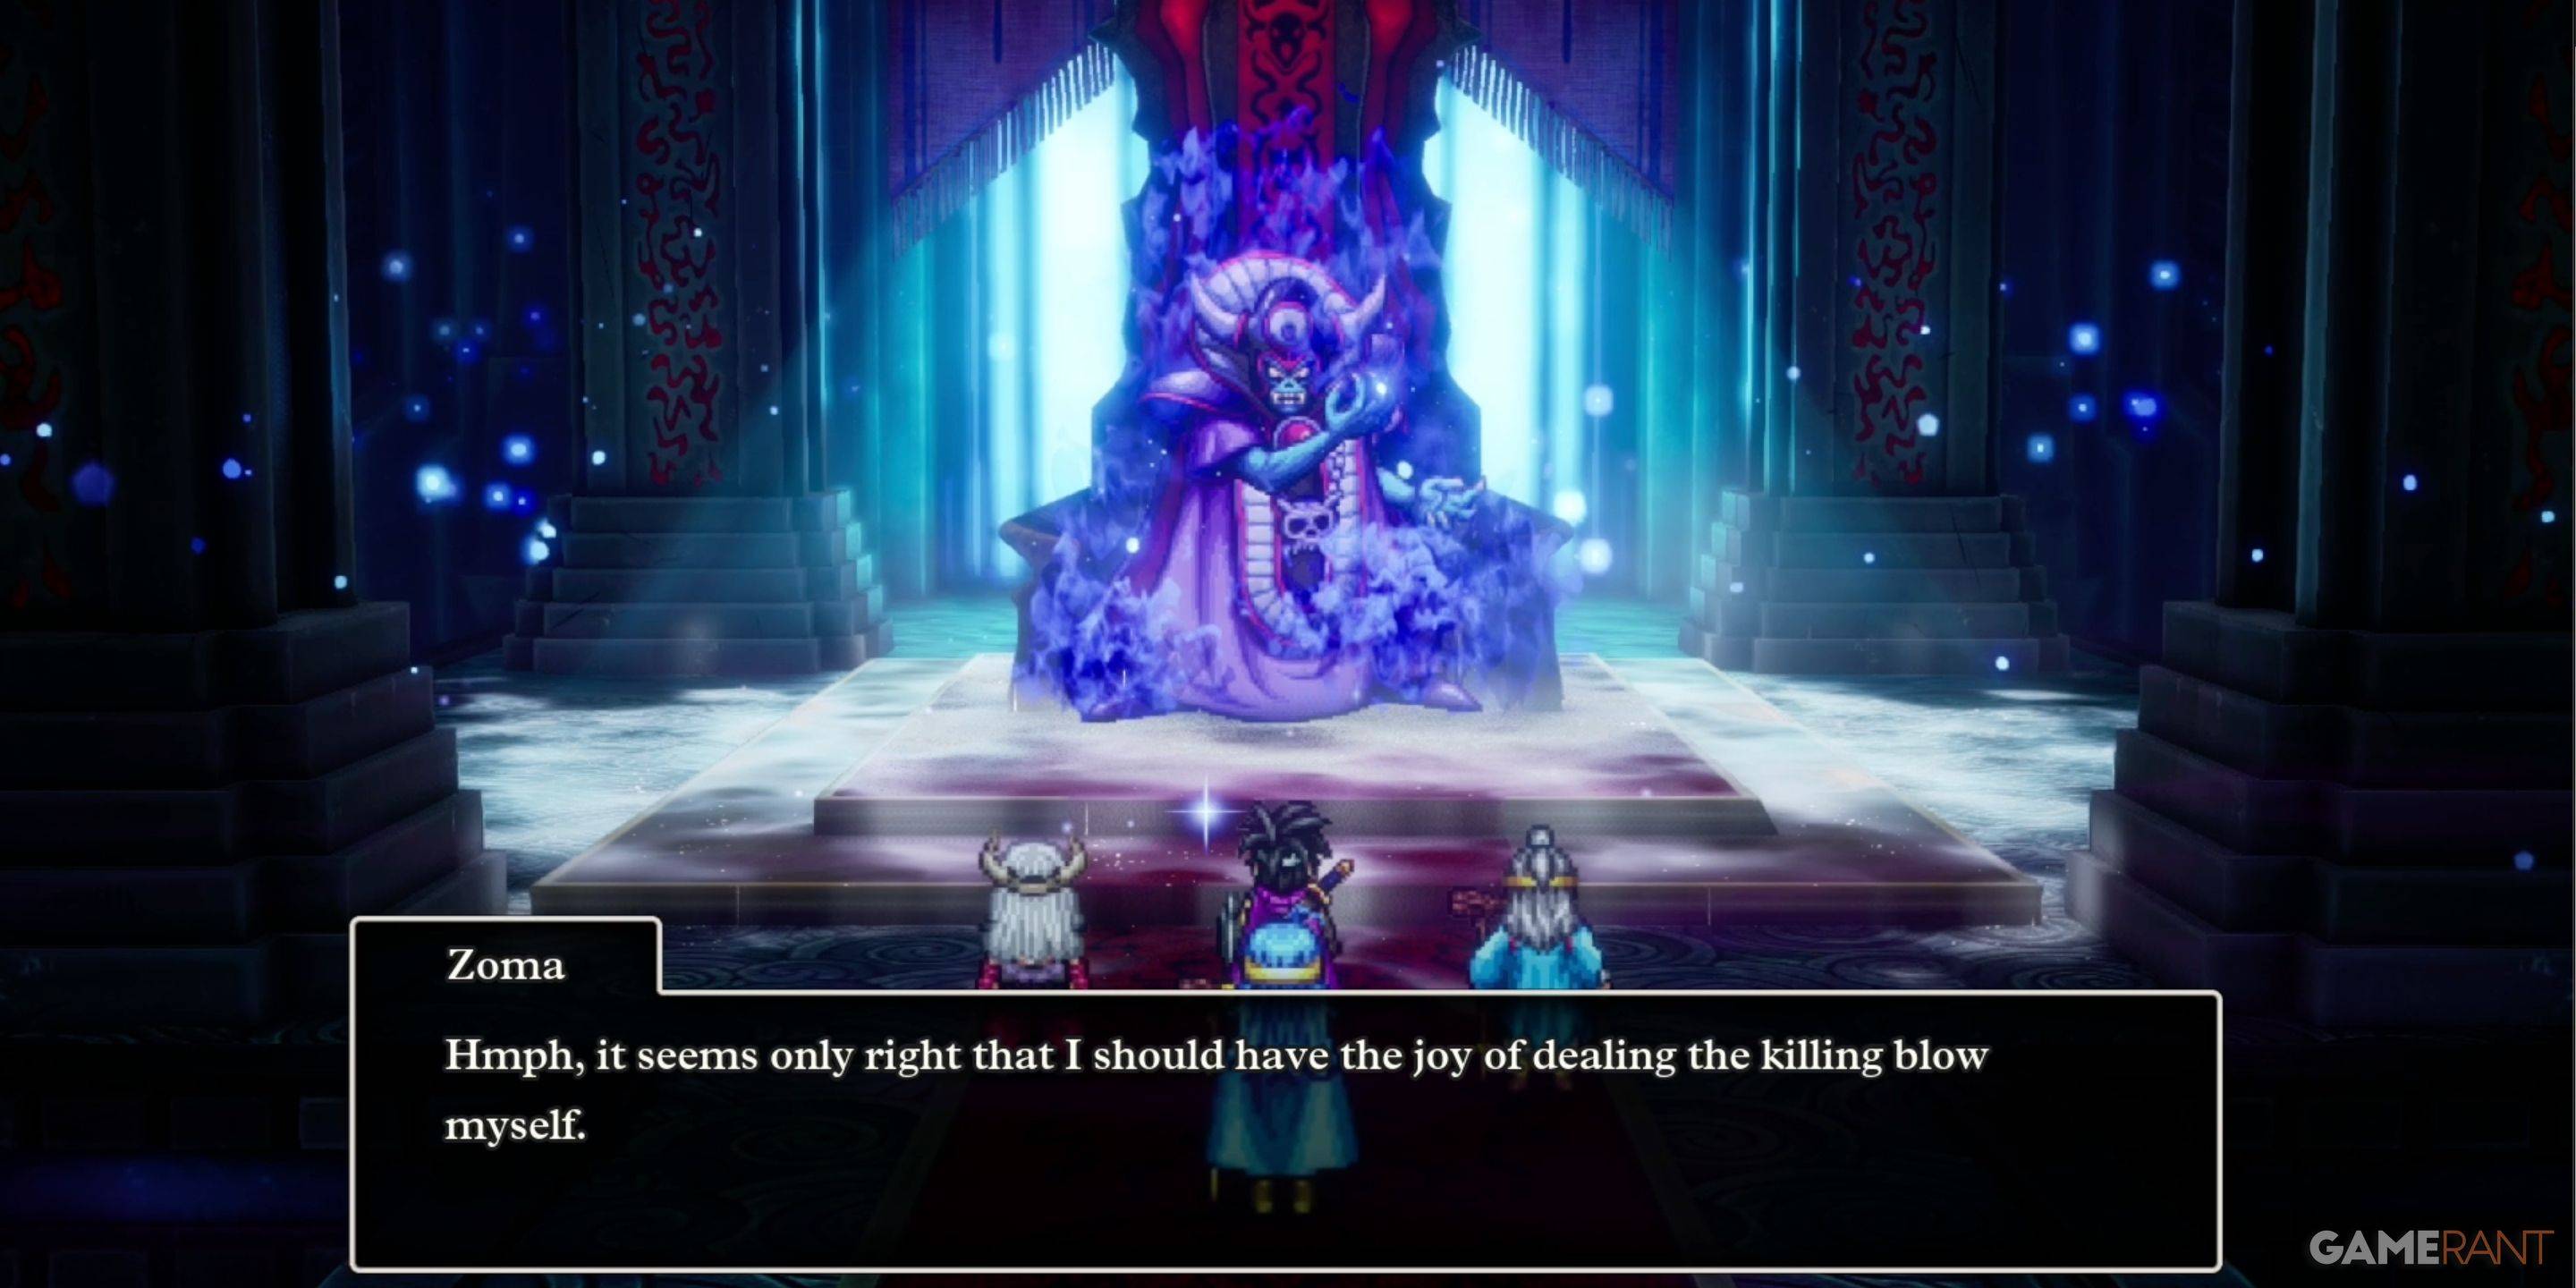
How to Defeat Zoma in Dragon Quest 3 Remake:
Zoma is the final boss of the main story and presents a significant challenge. The key to success is avoiding over-aggressiveness and focusing on strategic play to keep all four party members alive.
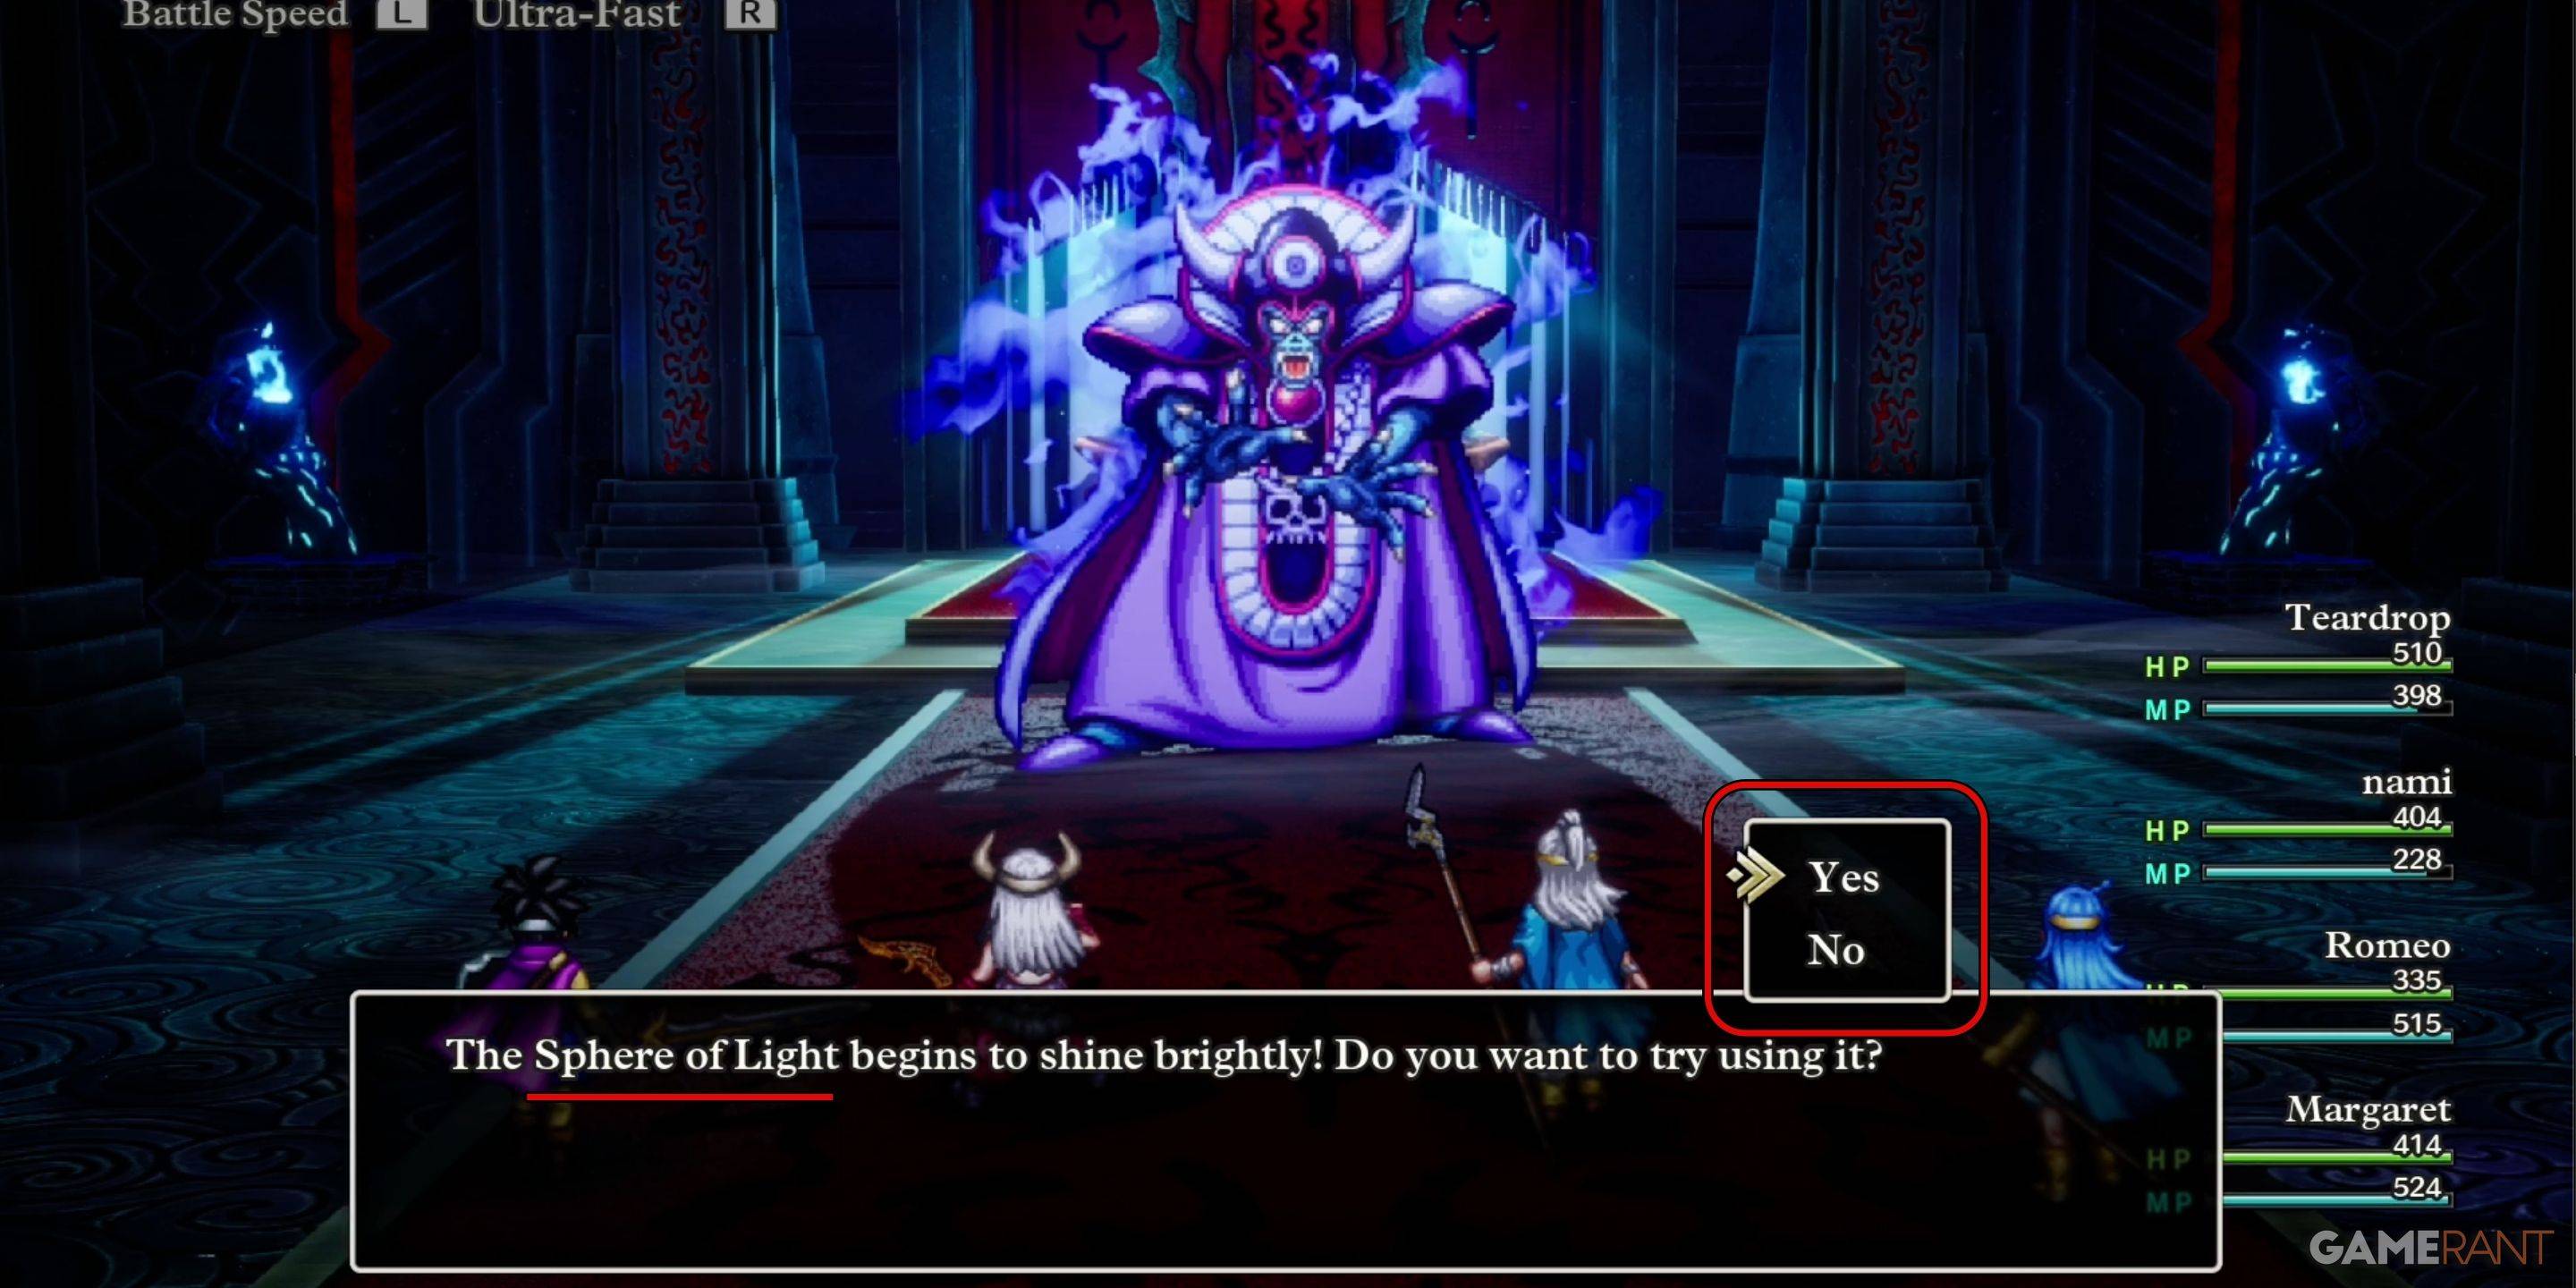 At the start, conserve your MP as Zoma is protected by a magic barrier that reduces the impact of magic attacks. Wait for the prompt indicating the Sphere of Light is ready, and choose to use it when prompted. This will remove Zoma's barrier, making them vulnerable to magic attacks.
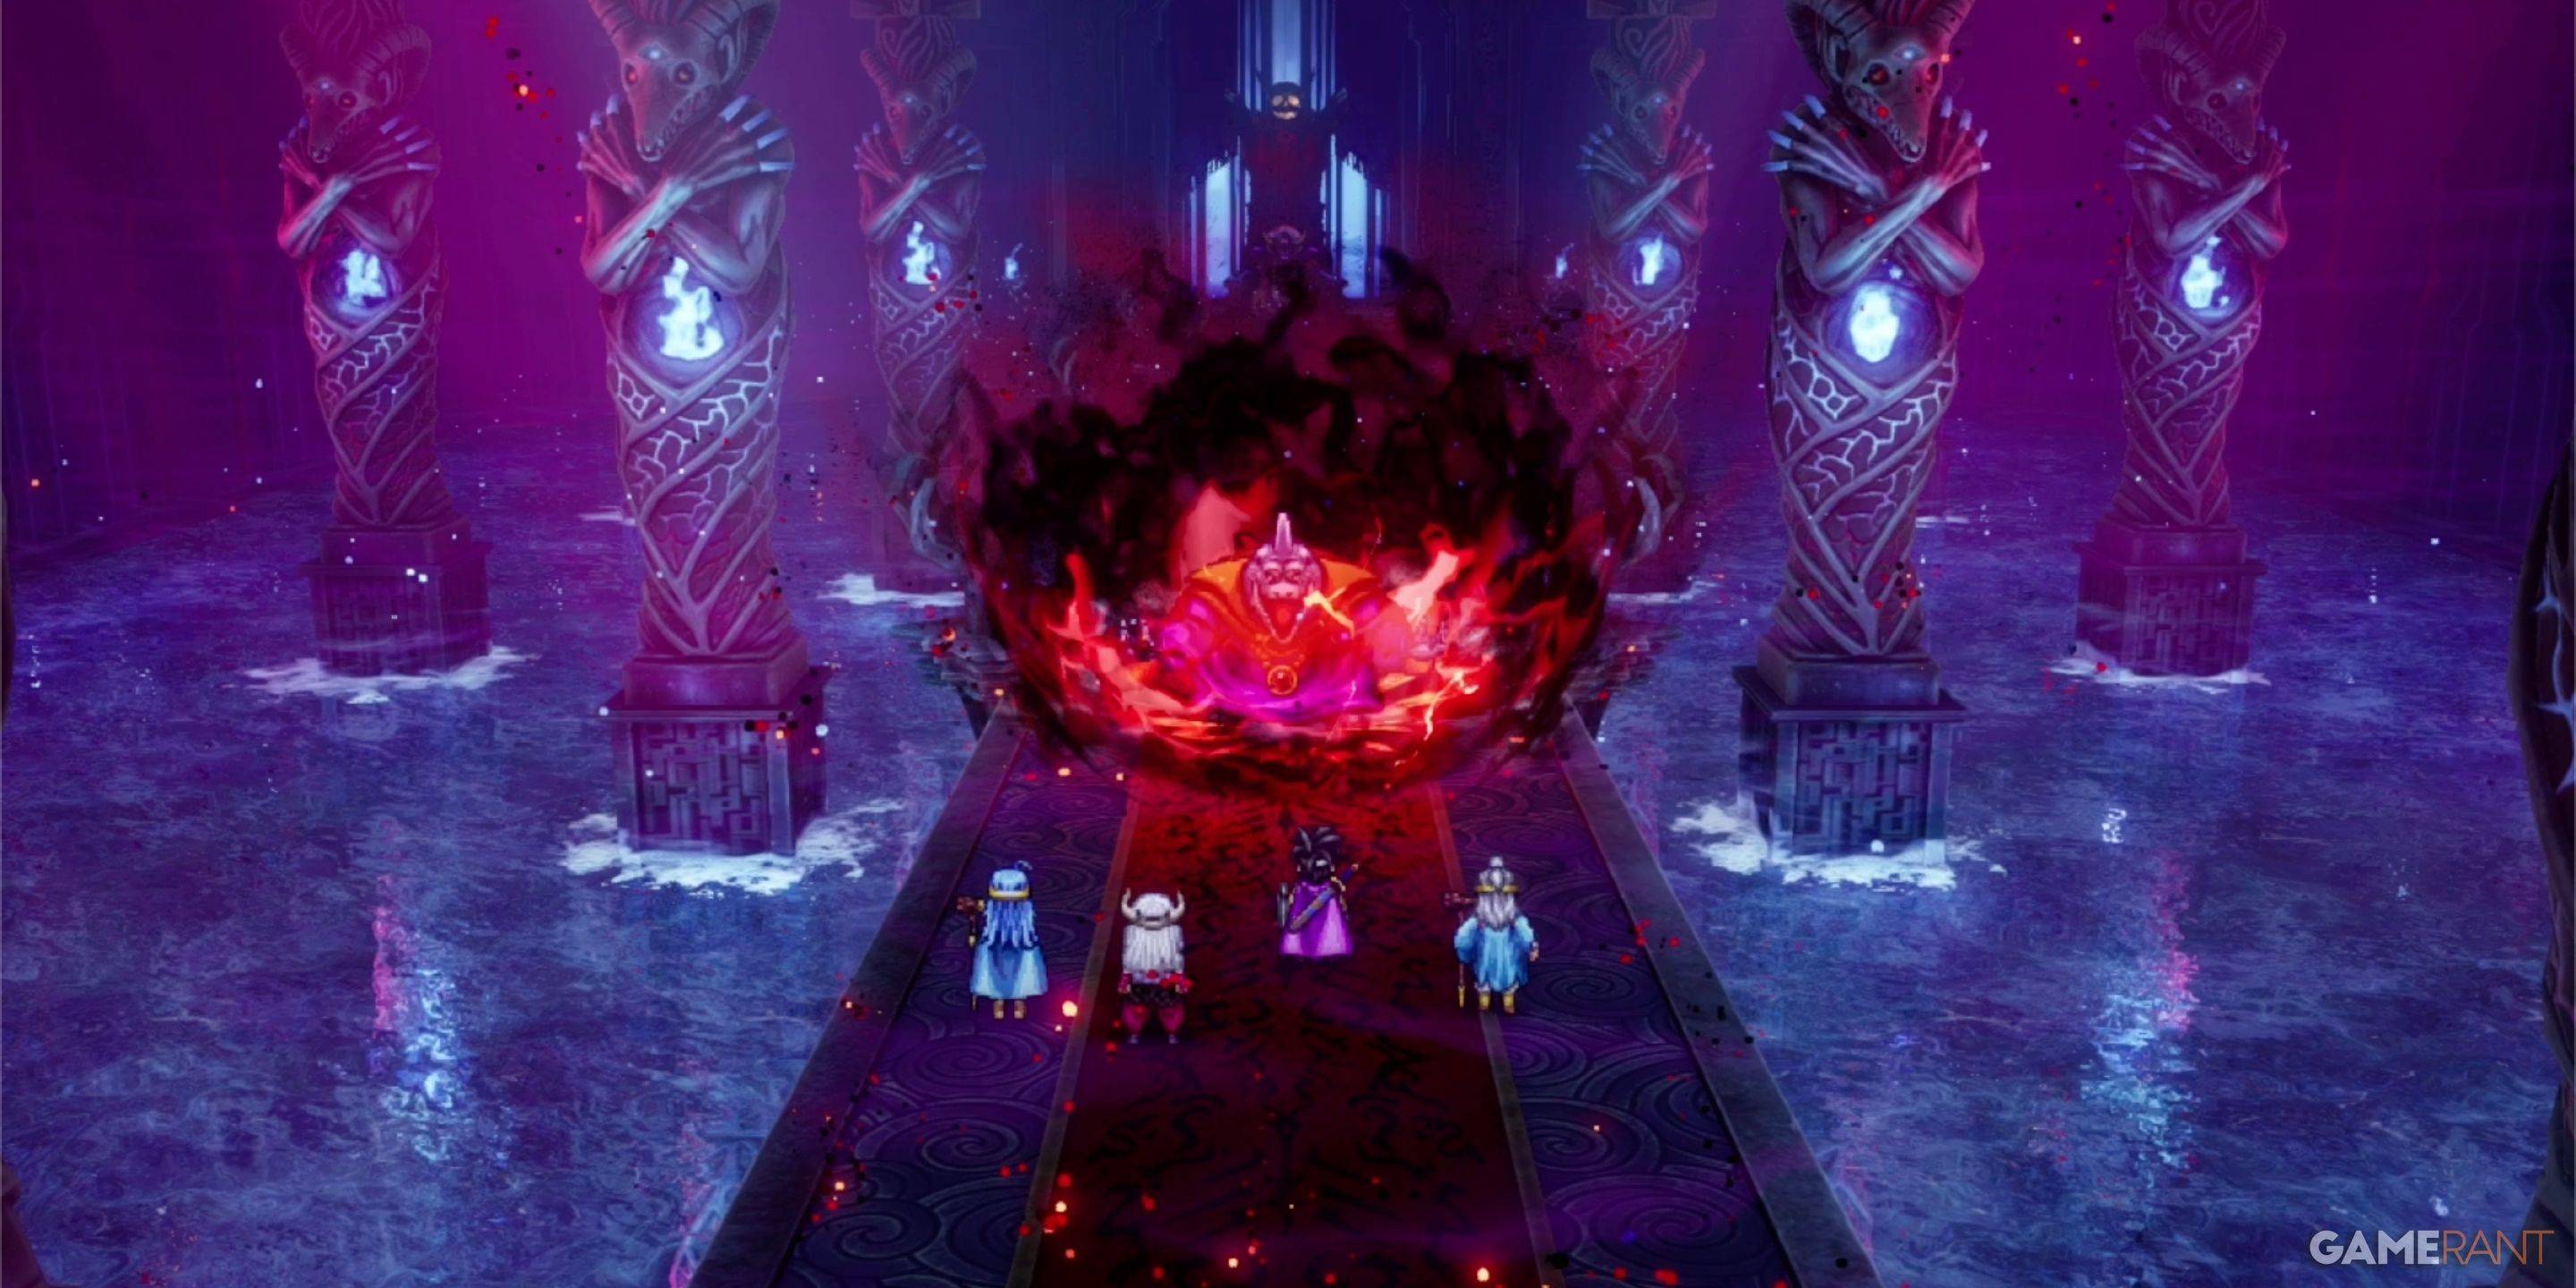
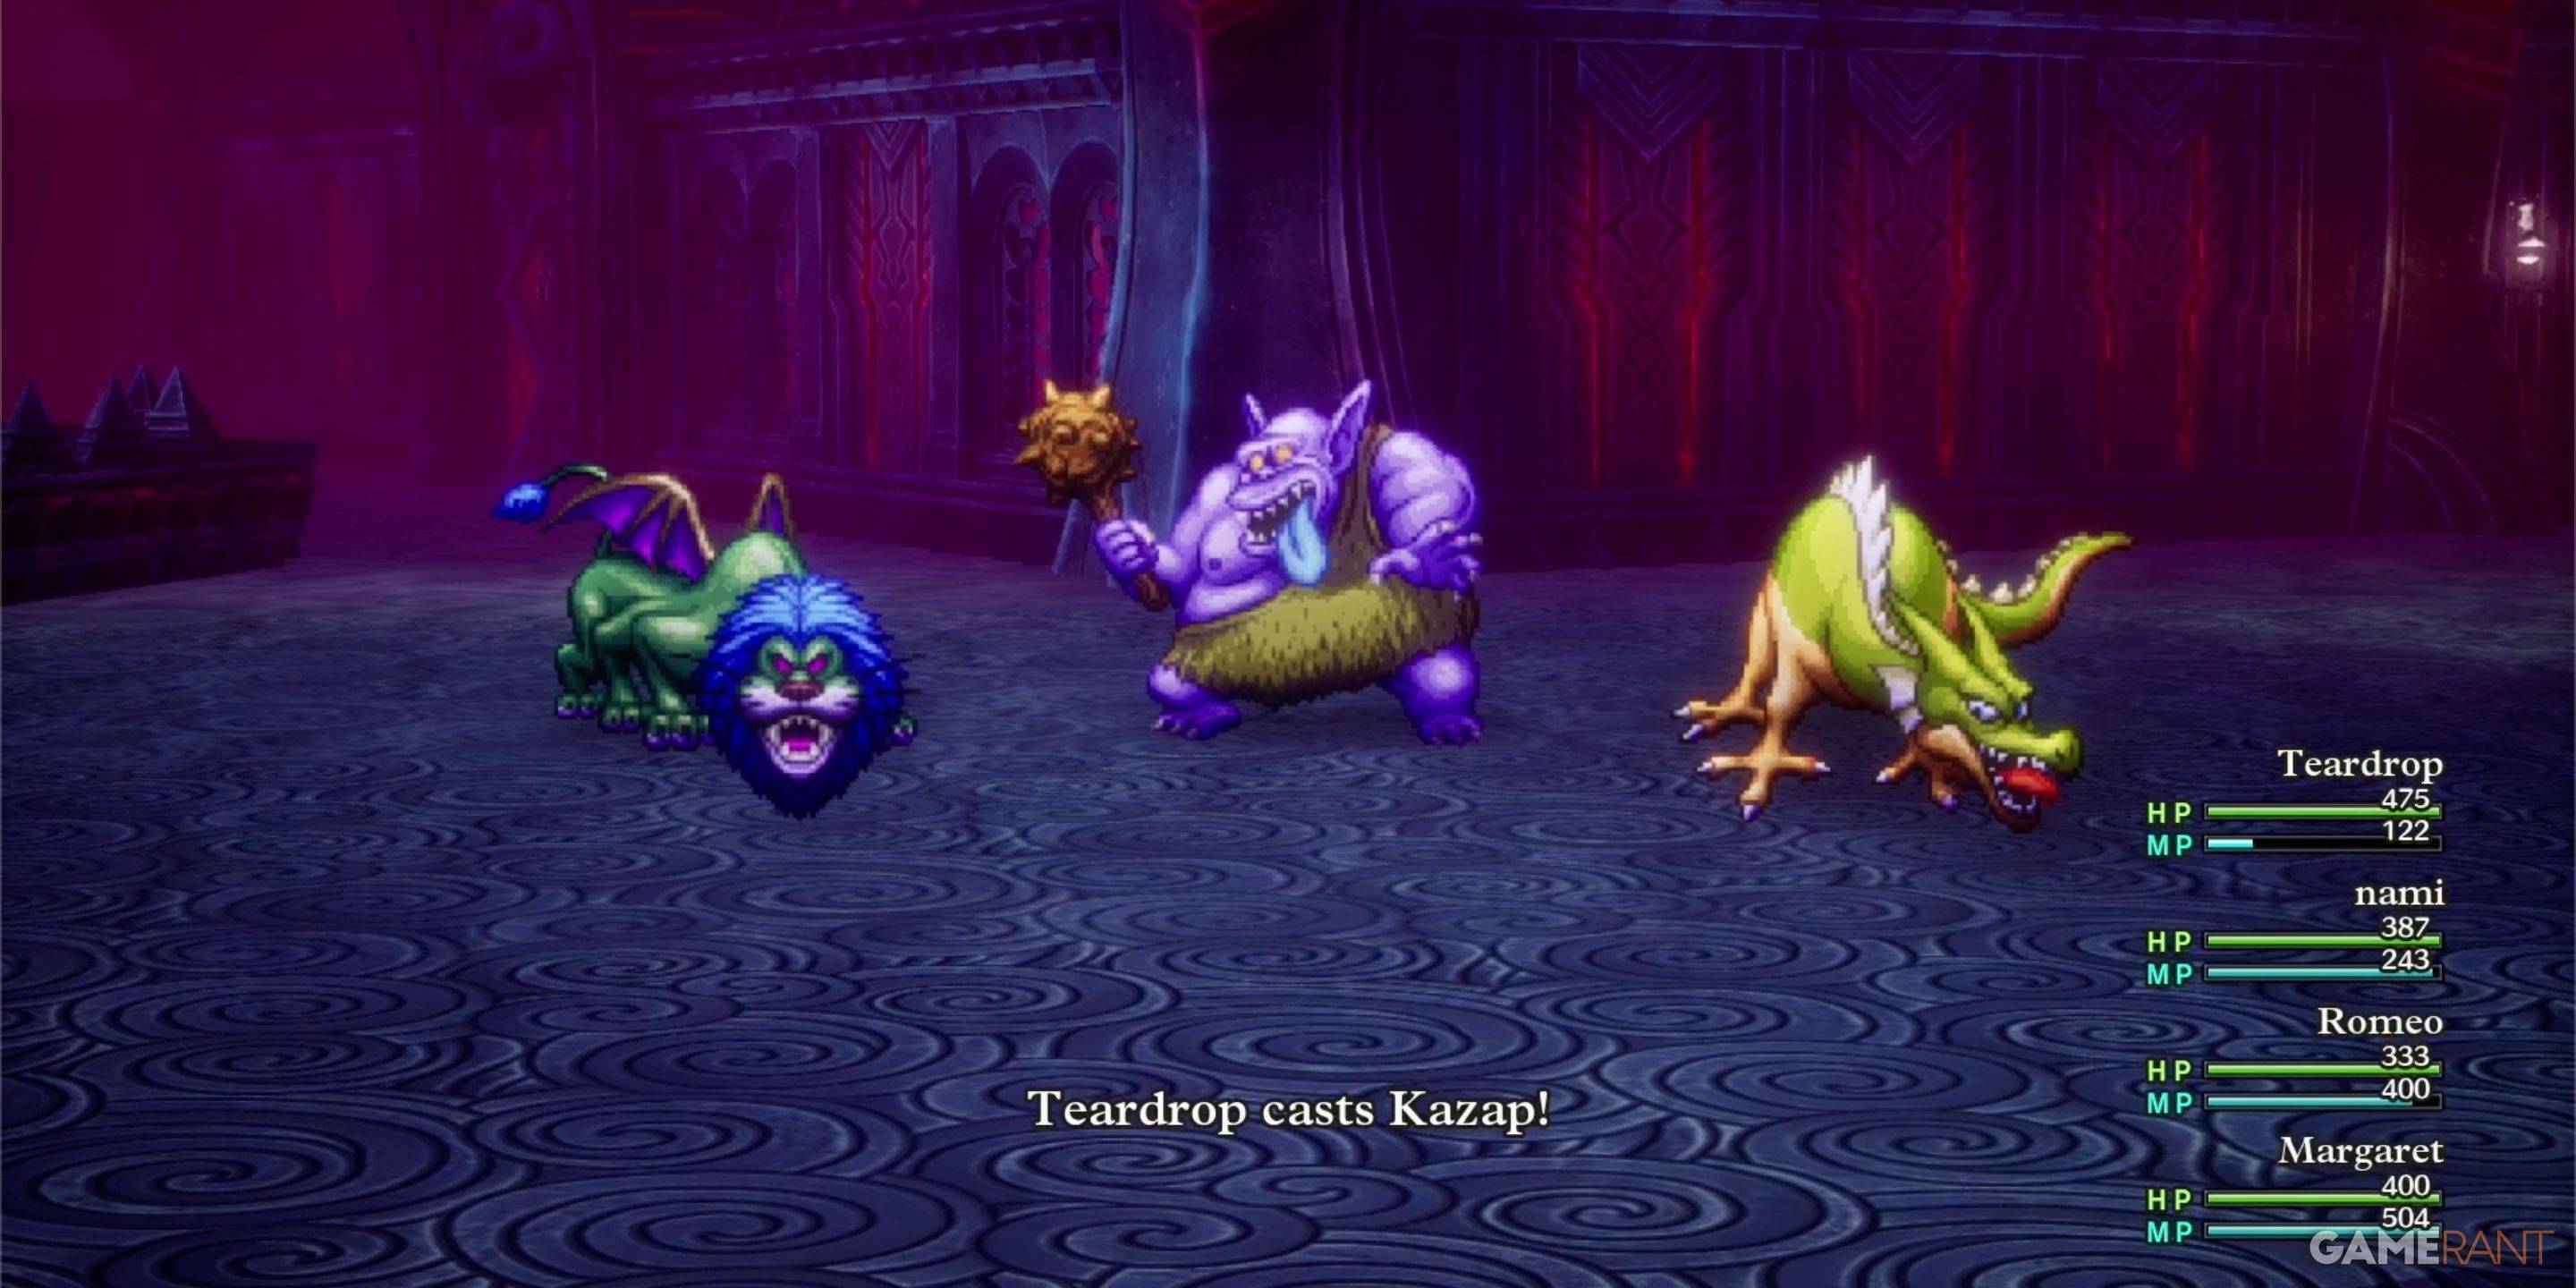
 With the barrier down, Zoma is weak to Zap attacks. Our Kazap spells dealt over 650 damage each turn. Utilize the Kazap and Monster Wrangler combo to maximize damage while allowing other party members to focus on healing and reviving. Be prepared to revive multiple party members more than once. Employ buffs, debuffs, and any equipment that reflects damage to your advantage.
The best approach is to take your time, prioritize your party's HP, and avoid rushing the fight. By following these guidelines, you'll ultimately triumph over Zoma.
Every Monster in Zoma's Citadel – Dragon Quest 3 Remake
| Monster Name | Weakness |
|---|---|
| Dragon Zombie | None |
| Franticore | None |
| Great Troll | Zap |
| Green Dragon | None |
| Hocus-Poker | None |
| Hydra | None |
| Infernal Serpent | None |
| One-Man Army | Zap |
| Soaring Scourger | Zap |
| Troobloovoodoo | Zap |
-
 Dungeon LifeDelve deep into the mighty dungeon to uncover gold, treasures, and everlasting glory!Dungeon Life features an endless progression system, reminiscent of casual and idle games, where players can continuously gather ever-increasing loot and gold.As you
 -
 Flash Game for Mobile 2024Miss flash games? Wish you could play them again on your smartphone?Want to enjoy them with simple, customizable controls? Then you need Flash Game for Mobile – the ultimate app for flash gaming.Flash Game for Mobile is the go-to app for playing flas
 -
 USPhoneBookUSPhoneBook, the premier reverse caller ID application, empowers users to identify spoofed numbers and block nuisance calls effortlessly. Having scanned more than 2 billion contacts, this tool allows you to trace unknown digits to uncover addresses a
 -
 The Evil Teacher Horror GameExperience the spine-chilling horror of "The Evil Teacher Prank & Escape" game, a terrifying adventure that will keep you on the edge of your seat!Get ready for a bone-chilling horror experience in this ultimate evil teacher adventure. "The Evil Teac
 -
 KaetramKaetram is a pixel-art 2D MMORPG set in a fantastical medieval world!Step into the enchanting realm of Kaetram, a captivating 2D MMORPG set against a medieval backdrop filled with surprising twists. Journey across vast open-world landscapes where mys
 -
 Bus Games 3D-Bus Driving GamesExperience the ultimate bus simulator adventure with our offline 3D bus game featuring the latest 2021 edition.Ultimate 3D Bus Simulator 2021: The Best Driving ExperienceDive into free bus simulator gameplay featuring realistic passenger transport an